Schedule balance imports
Use scheduled balance imports to automatically refresh general ledger balance data on a recurring basis, without requiring an administrator to run each import manually. Scheduling reduces the month-end bottleneck that occurs when preparers must wait for an administrator to import balance data before they can begin reconciliation work.
This topic is intended for administrators who configure data sources and balance import schedules. Preparers and reviewers do not configure schedules, but their reconciliation tasks receive updated balance data automatically once a schedule is active.
Note: For Balance imports the Period column is mandatory in Data Integration . Entity, Account, and Period must be defined to ensure imported data is loaded correctly into the appropriate period.
Define the data source
-
Follow steps 1-5 of Define the data source to create the data source for the supporting items.
-
Ensure that the Data source type field is set to Balances.
-
Save the data source.
Enable a data source for scheduling
Before a data source can be included on a balance schedule, an administrator must enable scheduling for that data source.
-
Go to
 > Import Data.
 -
Select the Balance tab.
-
Review the grid of balance data sources. The grid displays the columns for the following: data source, data source type, entities selected and the schedule.
-
In the Schedule column, toggle the switch on or off for the data source.
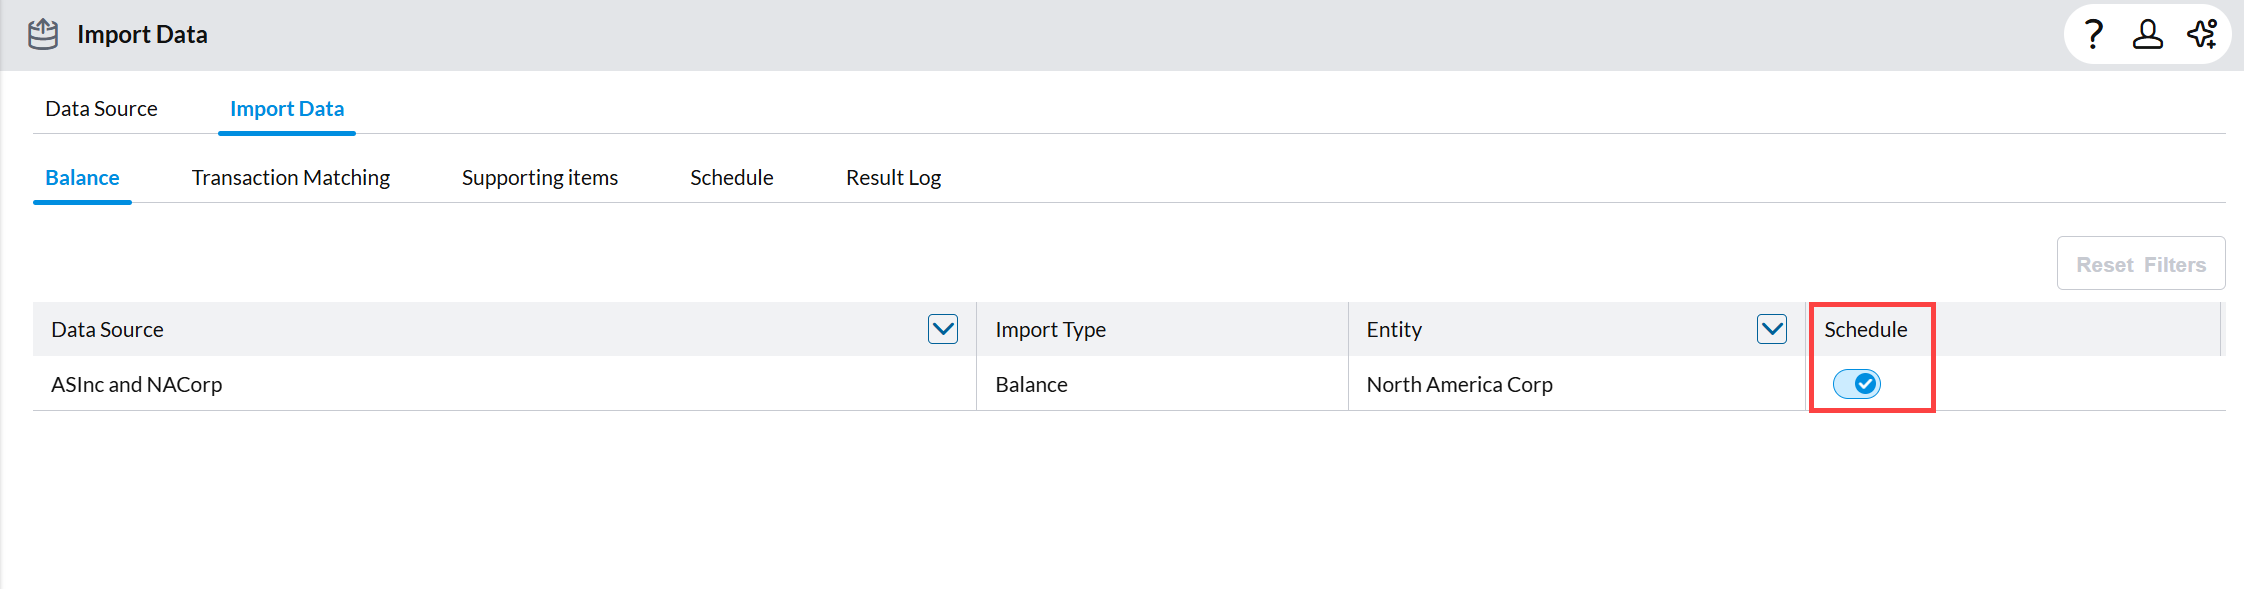
Turning off the toggle for a data source immediately excludes that data source from every schedule that includes it. No confirmation dialog displays when you change the toggle.
Set a schedule for the balance import
Here, you will create or edit the balance schedule and select the data source or data sources that the schedule imports
-
The data source list includes only balance-type data sources.
-
Editing an existing schedule displays the data sources that are already selected.
-
A data source can belong to only one balance schedule at a time. If you select a data source that another balance schedule already uses, the system does not save your selection and displays a validation message.
-
In
> Import Data, select the Schedule tab. -
Click . The Set Schedule page displays.
-
Provide the required information:
Import Details
-
Import type — Identifies the kind of data being scheduled. For example, Balance
-
Data sources — Select one or more data sources to include on the schedule.
Schedule Details
-
Name — Enter the name the schedule.
-
Perform task — Set how often the schedule runs (for example, Daily, Weekly, Monthly).
Schedule Options
-
Time zone — Select the time zone the schedule uses to calculate run times.
-
Start time — Hour, minute, and AM/PM fields for the time of day the schedule first runs.
-
Start date — Select the start date.
-
End date — Select the date the schedule stops running.
-
Run process — Recurrence interval field. Enter a value to set the recurrence interval for the schedule, expressed as "Every [number] day(s)."
-
-
Save the schedule. The set schedule is listed in the Schedule tab.
How a scheduled balance import runs
On its recurrence, an active balance schedule imports data for each entity included in its data sources. For each entity, the import runs only when all of the following are true:
-
The period is open.
-
The workflow status of the reconciliation is Not Started or In Progress.
-
The task status of the reconciliation is any status except Completed.
If any of these conditions is not met for an entity, the import skips that entity. Other entities in the same scheduled run are not affected.
A scheduled import never changes a reconciliation that has a Completed task status. Completed reconciliations are not reset or overwritten by a scheduled run.
Each imported balance is placed into the period identified on the source data. If the source data spans multiple open periods, each balance imports only into its own period; a single balance amount does not repeat across every open period.
View job log
-
Go
. -
Click
 to open Data Integration.
 -
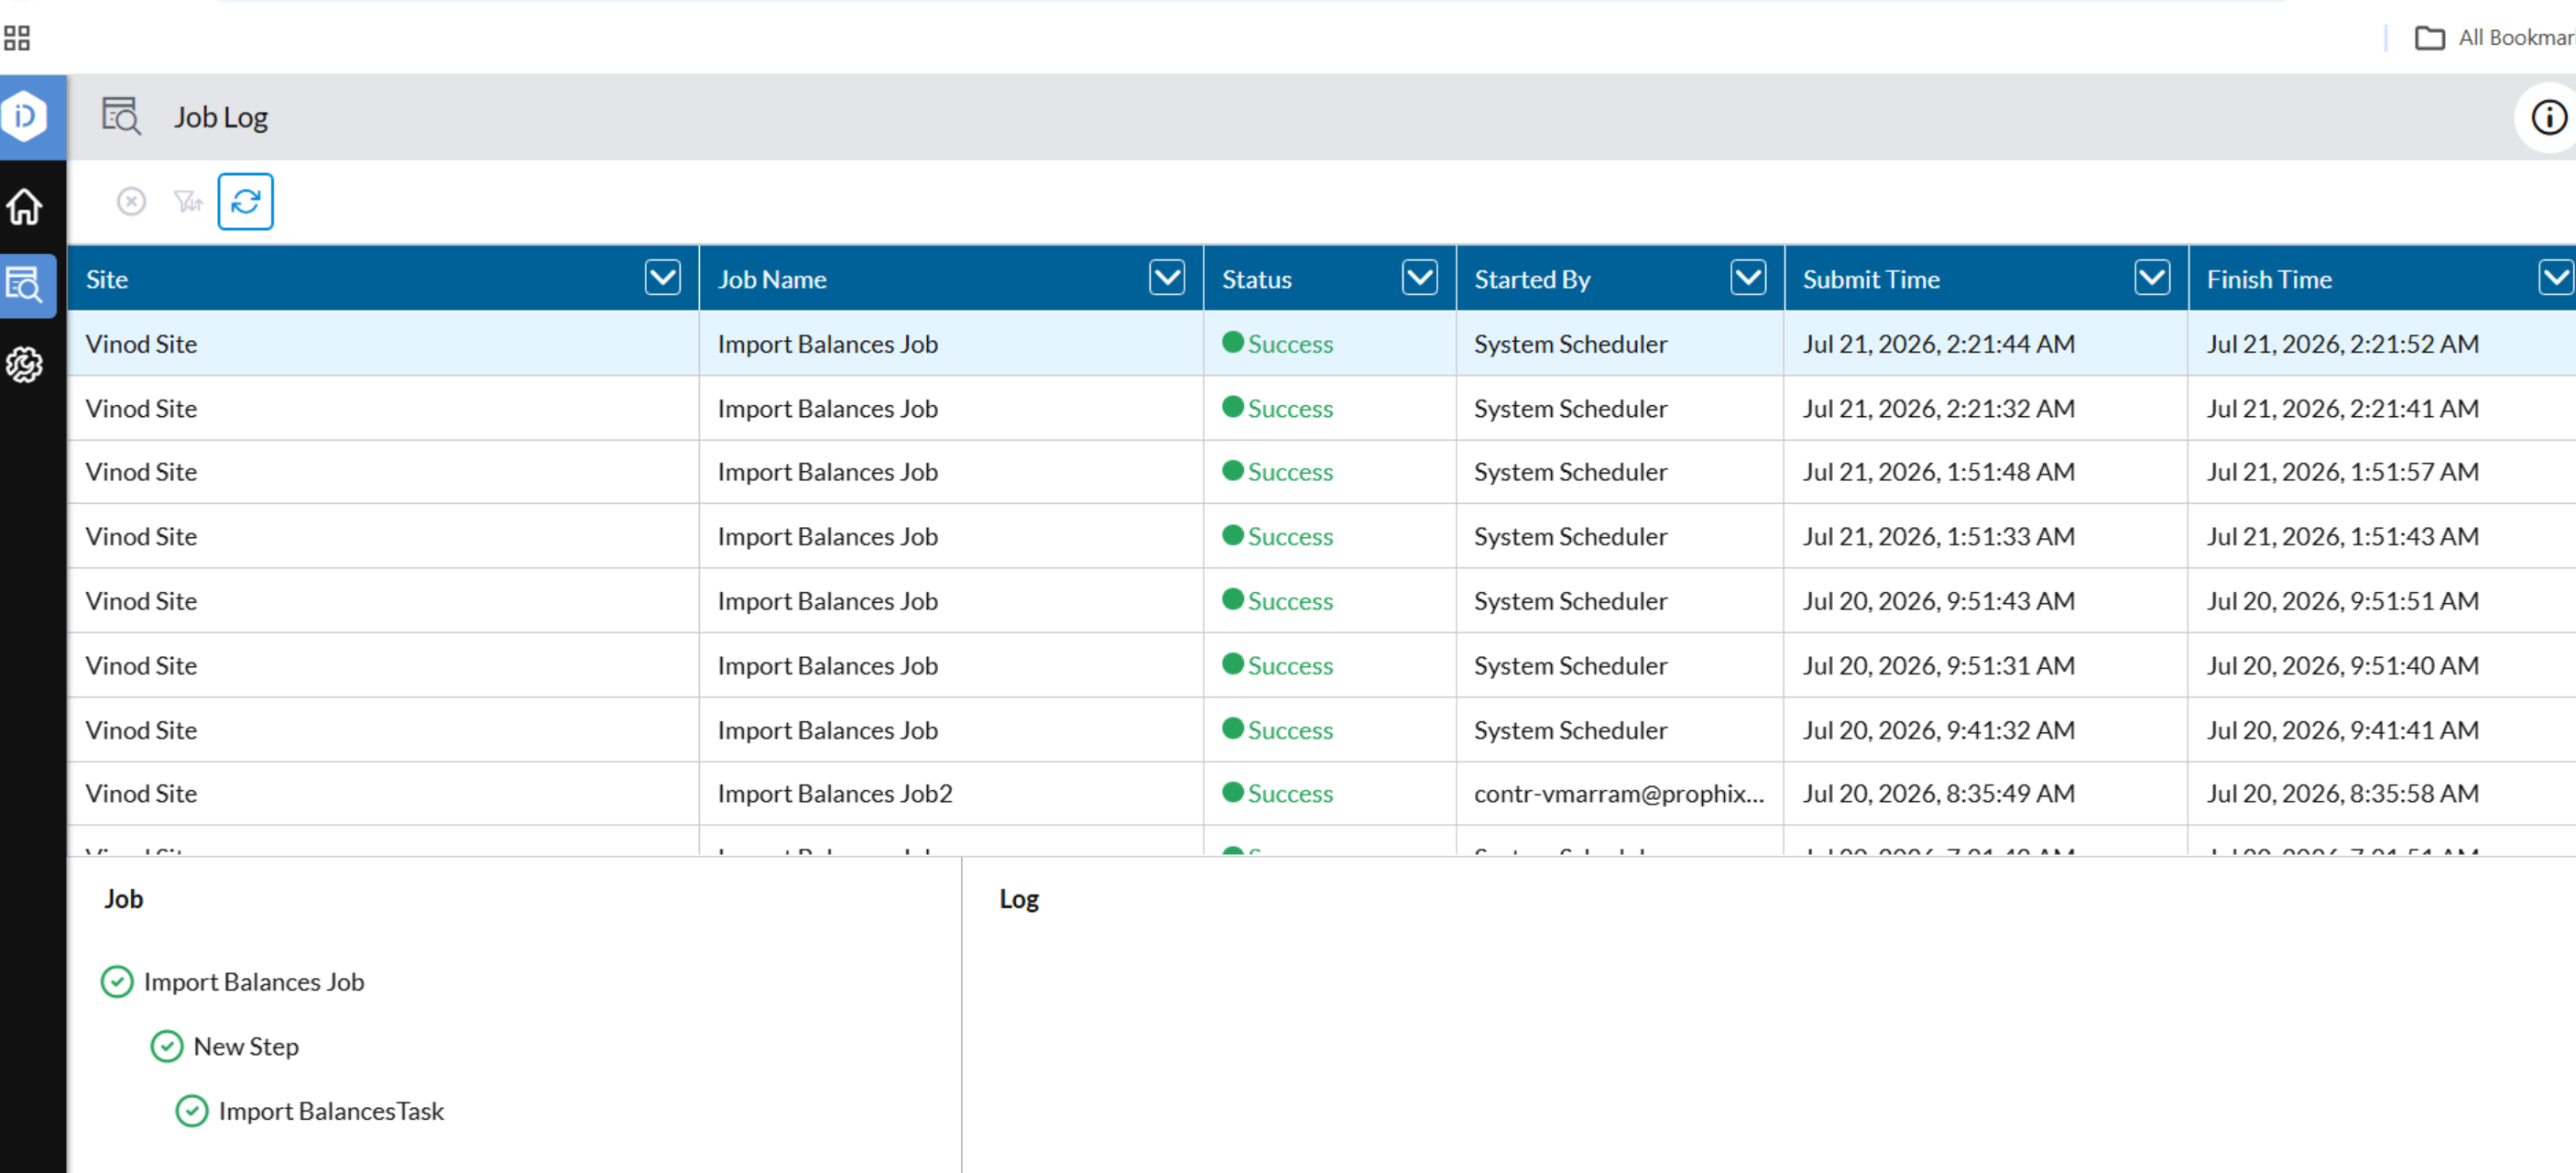
On the navigation menu of Data Integration, click Job Log.
Review the result log for a scheduled run
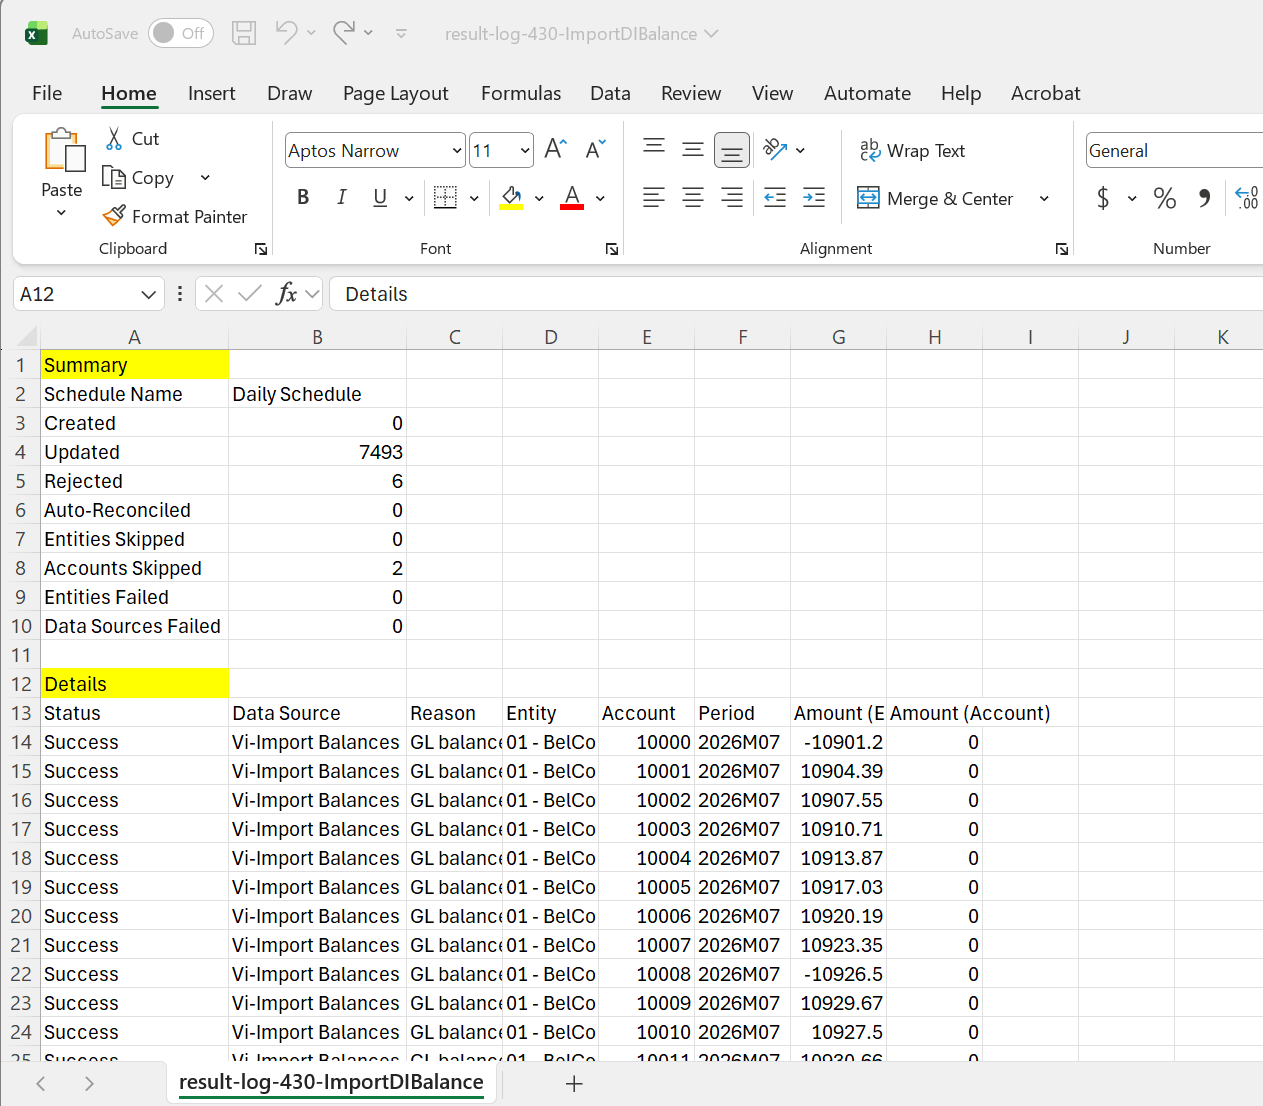
Each scheduled run generates one result log entry that you can download.
-
A summary section shows the total number of records processed, the number successfully imported, and the number rejected.
-
A detail section lists each record, including the data source it came from, the entity, account, period, and amount.
-
Skipped records include a reason, such as a closed period or a completed task.
The result log is the single source of truth for a scheduled run. The system does not send a separate error notification for skipped records.
To view the result log:
-
Go to
> Import Data. -
Click the result log and look for the applicable entry
-
Click
 to generate the report.
 -
Open or download the report.