Prophix Copilot for Microsoft Office
Prophix Copilot is an add-in for Microsoft Office. Once installed, you can use it inside Word, PowerPoint, Excel, and Outlook to get financial explanations and data insights without leaving your document, presentation, or spreadsheet.
This article includes how:
-
Administrators obtain the Prophix Copilot app package
-
System administrators and users install the Prophix Copilot add-in for Microsoft Office
-
Users sign in and use Prophix Copilot in their supported office application
Note: Depending on your organizational workflow, your experience may be different.
Make Prophix Copilot available in Office (Admin)
To make the app available to users, administrators must first upload the Prophix Copilot app package to their organization’s Microsoft Office environment. This process ensures the app is securely distributed and controlled within your organization for users to access.
Before you begin
-
Ensure that you have Office administrator permissions to upload apps.
-
Obtain the Prophix Copilot app package (.zip) from the Prophix Help Center.
To obtain the Copilot app package:
-
Download the Copilot app package from the Prophix Help Center.
-
Open the Microsoft 365 Admin Center.
-
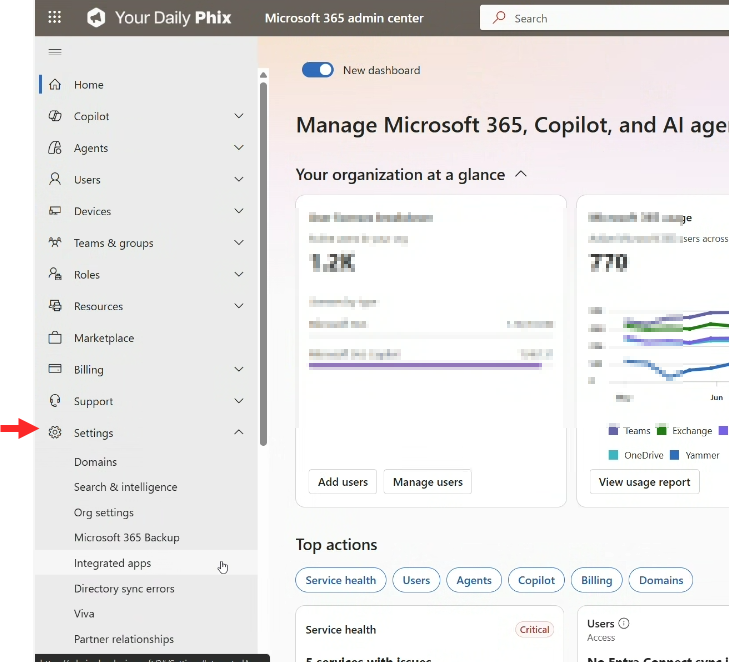
Go to Settings > Integrated apps.
-
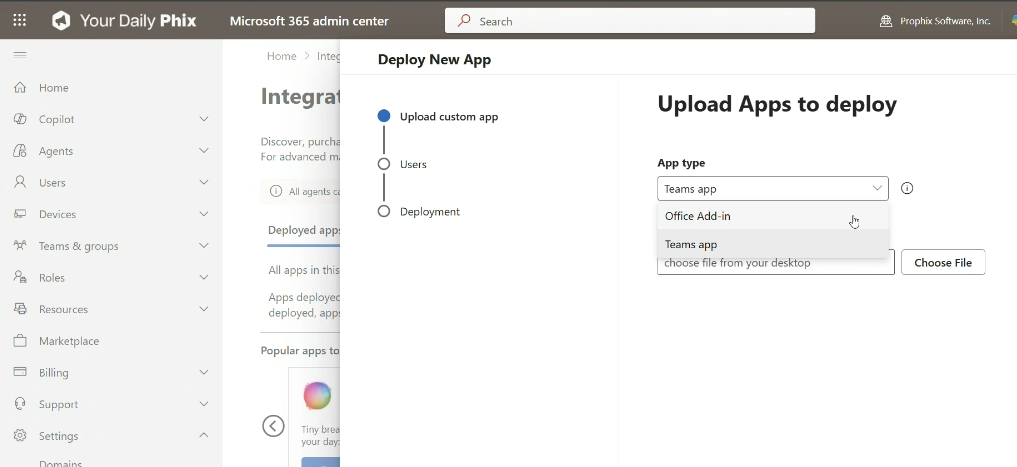
In the Deploy New App dialog, click Upload custom app and select the app package.
-
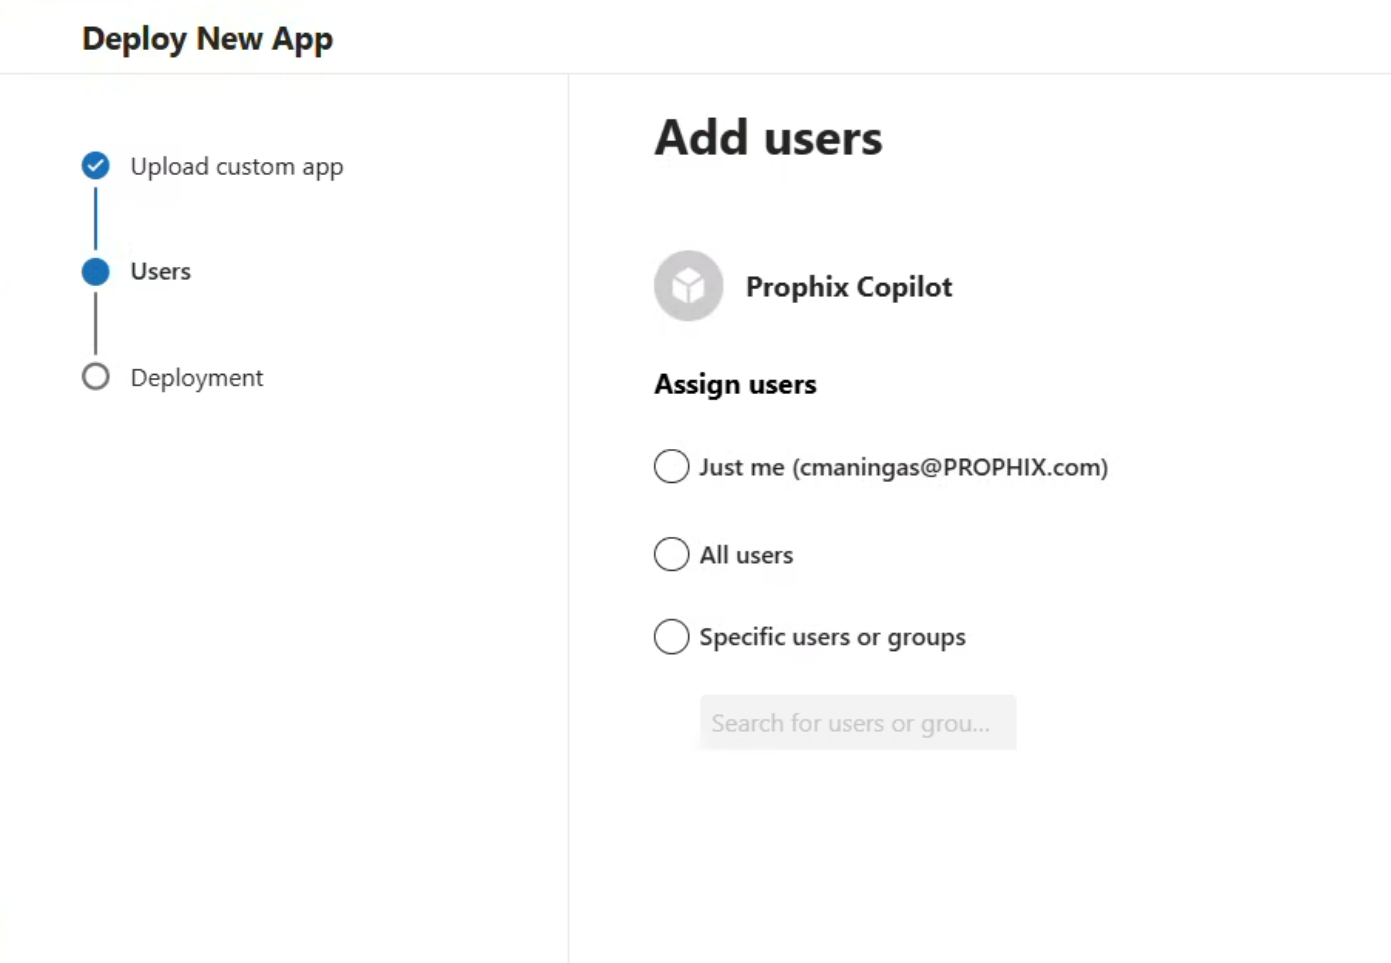
Add or restrict user access to the app in the Users tab.
-
Review the app permissions and capabilities in the Deployment tab.
-
Click Next to confirm the upload to make the app available in your organization’s app catalog.
After the upload is confirmed, proceed to install the add-in for the supported Microsoft Office applications.
Install Prophix Copilot for Microsoft Office
After your administrator has deployed the Prophix Copilot package to your organization's app catalog, use the following instructions to install the Prophix Copilot add-in for Microsoft Office.
Audience: System administrators and end users.
Before you begin, you need the following:
-
A supported Microsoft Office application: Word, PowerPoint, Excel or Outlook.
-
Your Prophix Account ID. If you do not have it, contact your Portal administrator.
-
Valid sign-in credentials for your Prophix application.
1. Install the Prophix Copilot Add-in
-
Open any supported Microsoft Office application (Word, PowerPoint, Excel or Outlook).
-
Select the Home tab on the ribbon.
-
Click Get Add-ins (or Office Add-ins, depending on your version). The Office Add-ins dialog opens.
-
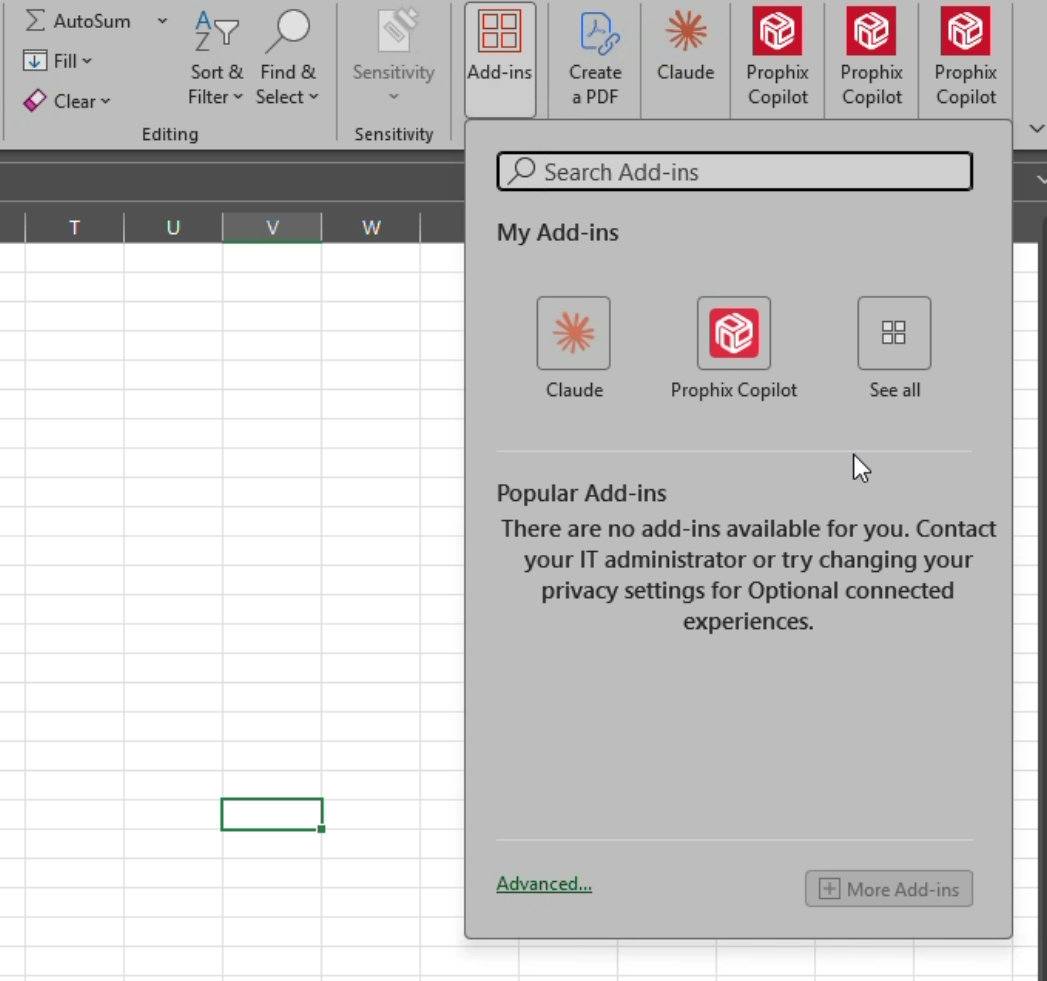
In the search bar, type Prophix Copilot and press Enter.
-
Select the Prophix Copilot add-in from the search results. The Prophix Copilot description page opens. The Overview and Permissions tabs describe the capabilities of the add-in.
-
Click Add. Prophix Copilot is added to your Office application. A confirmation message displays when the installation is complete.
-
Click Continue to close the confirmation dialog.
Note: After the add-in is installed, it is automatically available in all other supported Office applications. You do not need to repeat the installation for each application.
Proceed to sign into your Prophix application.
2. Sign in to your Prophix application
After the add-in is installed, complete the following steps to sign in and access your Prophix application.
-
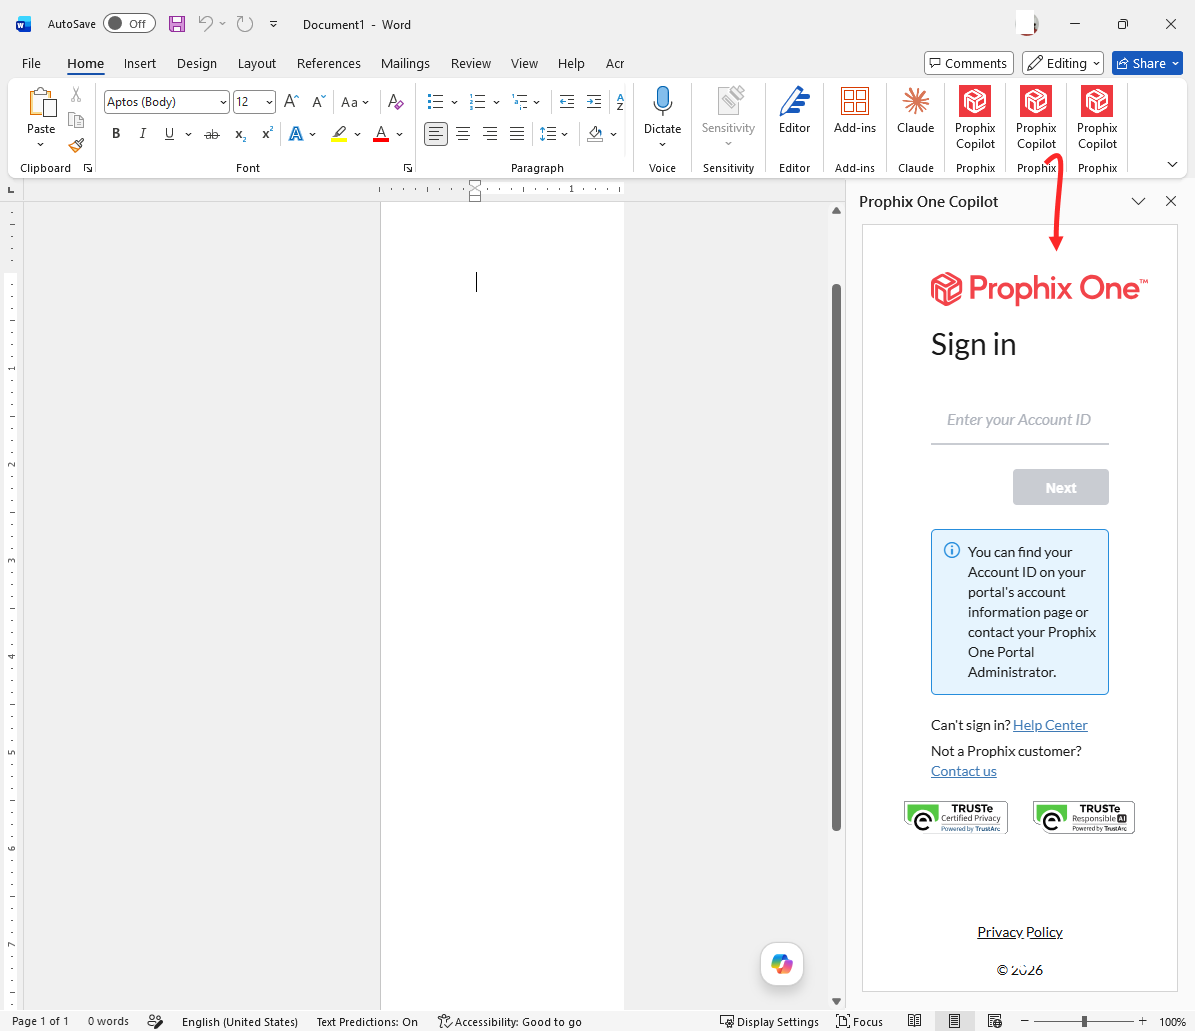
Open the Office application (Word, PowerPoint, Excel, or Outlook), then click the Prophix Copilot icon to open the panel. The icon appears in the Home tab or the Add-ins group, depending on the application. The Prophix One Sign In page opens in the panel.
-
Enter your Account ID, and then click Next. If you are unsure of your Account ID, contact your Portal administrator.
-
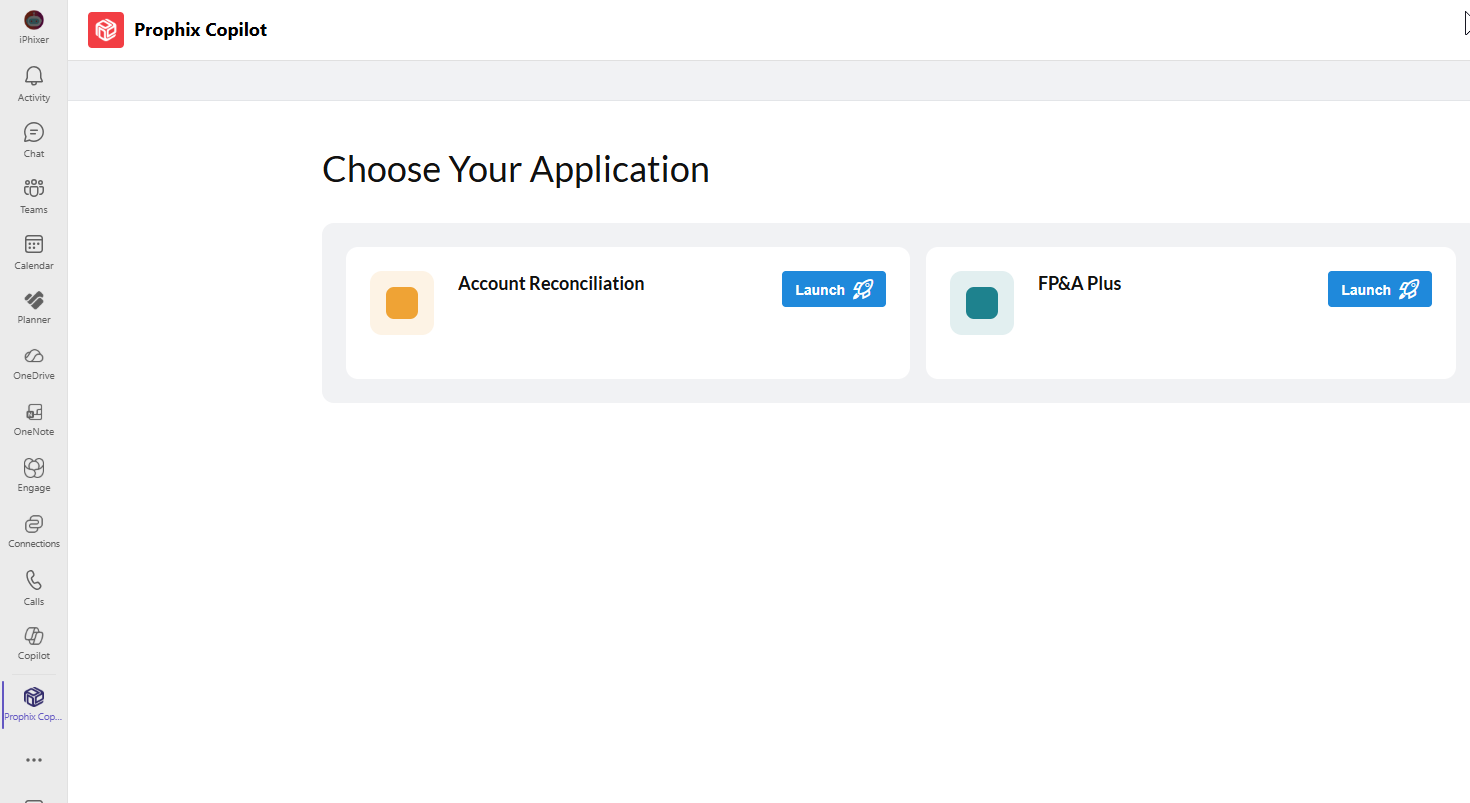
Enter your sign-in credentials and then complete any required multi-factor authentication. The Choose Your Application page opens.
-
Locate the application you want to use and click Launch. Prophix One Copilot opens for the selected application inside the Office panel.
-
After you have signed in, see Use Prophix Copilot in Office for instructions on using Copilot in Word, PowerPoint, Excel, or Outlook.
Use Prophix Copilot in Microsoft Office
This section is for users who have already installed and signed in to the Prophix Copilot add-in. If you have not installed the add-in yet, see Install Prophix Copilot for Office.
Applies to: Word, PowerPoint, Excel, and Outlook.
Prophix Copilot works the same way across all supported applications. You open the add-in, sign in, choose an agent, and ask questions in plain language. The only differences are how you open Copilot in each application and what each application is best used for. The table below summarizes these differences.
| Application | To open Copilot | Best used for |
|---|---|---|
|
Word |
Open Microsoft Word, then click the Prophix Copilot icon on the Home tab. |
Retrieving financial explanations and data insights while authoring reports or documents. |
|
PowerPoint |
Open Microsoft PowerPoint, then click the Prophix Copilot icon on the Home tab. |
Accessing financial summaries and data-driven insights while building presentations. |
|
Excel |
Open Microsoft Excel, then click the Prophix Copilot icon on the Home tab. |
Highlighting financial insights alongside spreadsheets for analysis, variance reviews, or model validation. |
|
Outlook |
Open Microsoft Outlook, then click the Prophix Copilot icon on the Home tab. |
Retrieving financial explanations and data insights while drafting or reviewing emails. |
Open and sign in to Prophix Copilot
These steps are the same in Word, PowerPoint, Excel, and Outlook.
-
Open the Office application (Word, PowerPoint, Excel, or Outlook), then click the Prophix Copilot icon to open the panel. The icon appears in the Home tab or the Add-ins group, depending on the application. The Prophix One Sign In page opens in the panel.
-
Sign in. See Sign in to your application for detailed instructions, then continue with the steps below.
-
Select between available Assistants and Agents using the drop down menu. Available agents are organized by function in the panel. See Use the Right Agent.
-
In the text box, type your question and interact with the agent as needed. For guidance on writing effective prompts, see How to Prompt.
-
When finished, click Logout to sign out.