In the Account Reconciliation application, global administrators are responsible for managing users and their permissions. User security is administered on Users page of the Settings menu.
Note: Users are added to the Account Reconciliation application via the Prophix Portal. A user requires a Portal account that determines what Prophix applications the user can access, as well as any other applications the Portal admins choose to add. Refer to the Portal Help for more information.
Access the Users page
-
On the navigation menu, click
 .
. -
Click the Users tab.
User profiles and roles
The following are the different roles and permissions that can be granted to users.
| Role | Description | Permissions |
|---|---|---|
| Global Administrator | This role has unrestricted access to everything in the application. |
|
| Administrator |
Role is restricted to certain entities in the application. |
|
| Contributors (Users) |
These users can be either Preparers or Approvers. |
|
Grant users access to entities
Security at the entity level allows for controlling the entities to which a user has access, limiting user access to assigned entities only.
-
Open the
menu and click the Users tab to display a list of users that have been added and assigned to the Account Reconciliation application. -
Highlight the user you want to assign to an entity.
-
In the Entity column , click
 to open the Select Entities page.
 -
From the Entities panel on the left, choose the entity and click
 to add it to the Selected Entities panel on the right.
 Note: To grant the user access to all the entities, click
 to select all of them.
 -
Click
 .
.
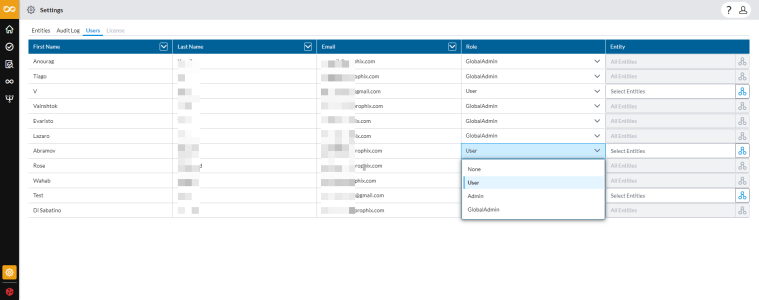
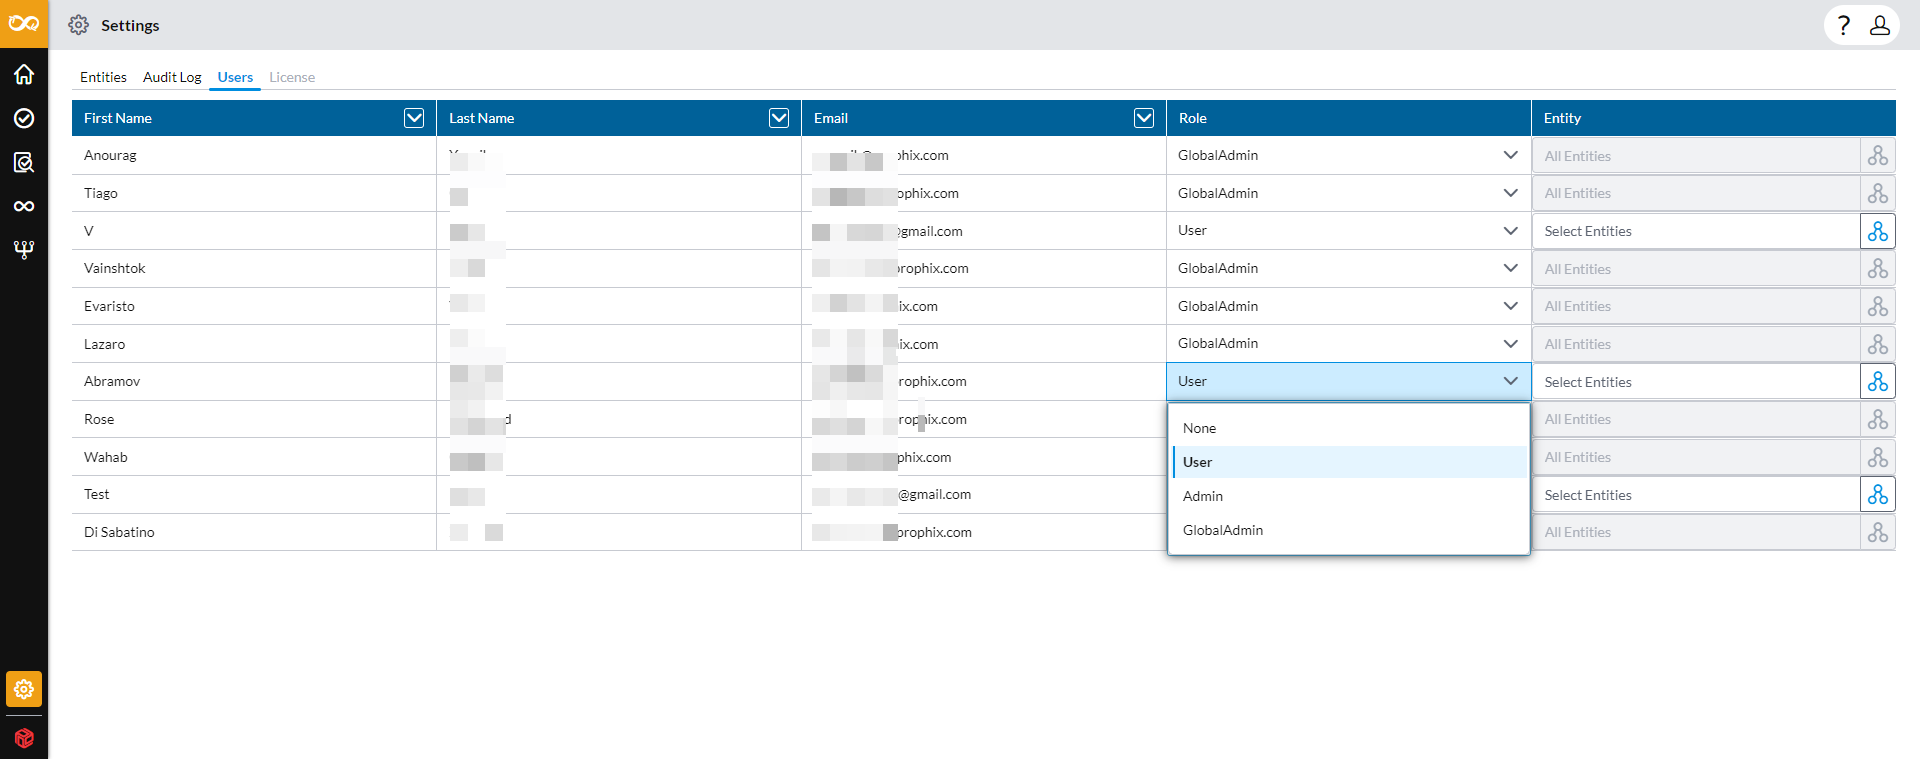
Assign roles to users
After users have been added and assigned to Account Reconciliation, the Administrator can now proceed to assign those users to their respective roles in the application. These roles determine the menus and functionality accessible to each user.
-
Open the
menu and click the Users tab to display a list of users that have been added and assigned to the Account Reconciliation application. -
Identify the user you want to assign a role to, and go to the Role column for that user. The default role for any user who has not been assigned a specific role is None.
-
Expand the Role field and choose a role for the user.
Note: When assigning a user or a User to an Administrator role, you are prompted to choose at lease on entity for the user to access before you can proceed.
Only the Global Administrator role has access to all entities.
Change a user’s role
Administrators can switch or update the roles of users in the application.
-
Open the
menu and click the Users tab to display a list of users that have been added and assigned to the Account Reconciliation application. -
Identify the user whose role you want to change.
-
Expand the Role field and choose a new role for the user.
Note:-
If you are the only Global Administrator, you cannot change your role.
-
If changing the role of a Global Administrator to either an Administrator or User, you are prompted to assign at least one entity to the user’s new role before you can proceed.
-
If changing the role of a User to an Administrator, or Administrator to a User, you are prompted to assign at least one entity to the new role before you can proceed.
-
-
Confirm that you want to update the user’s role.
The user will