Set up AR with FP&A Plus
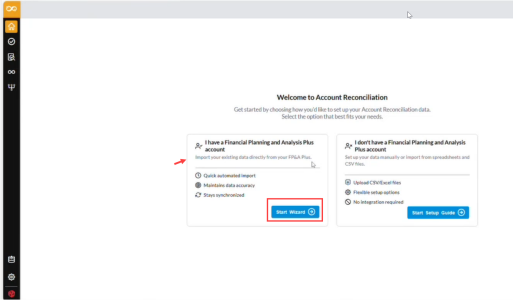
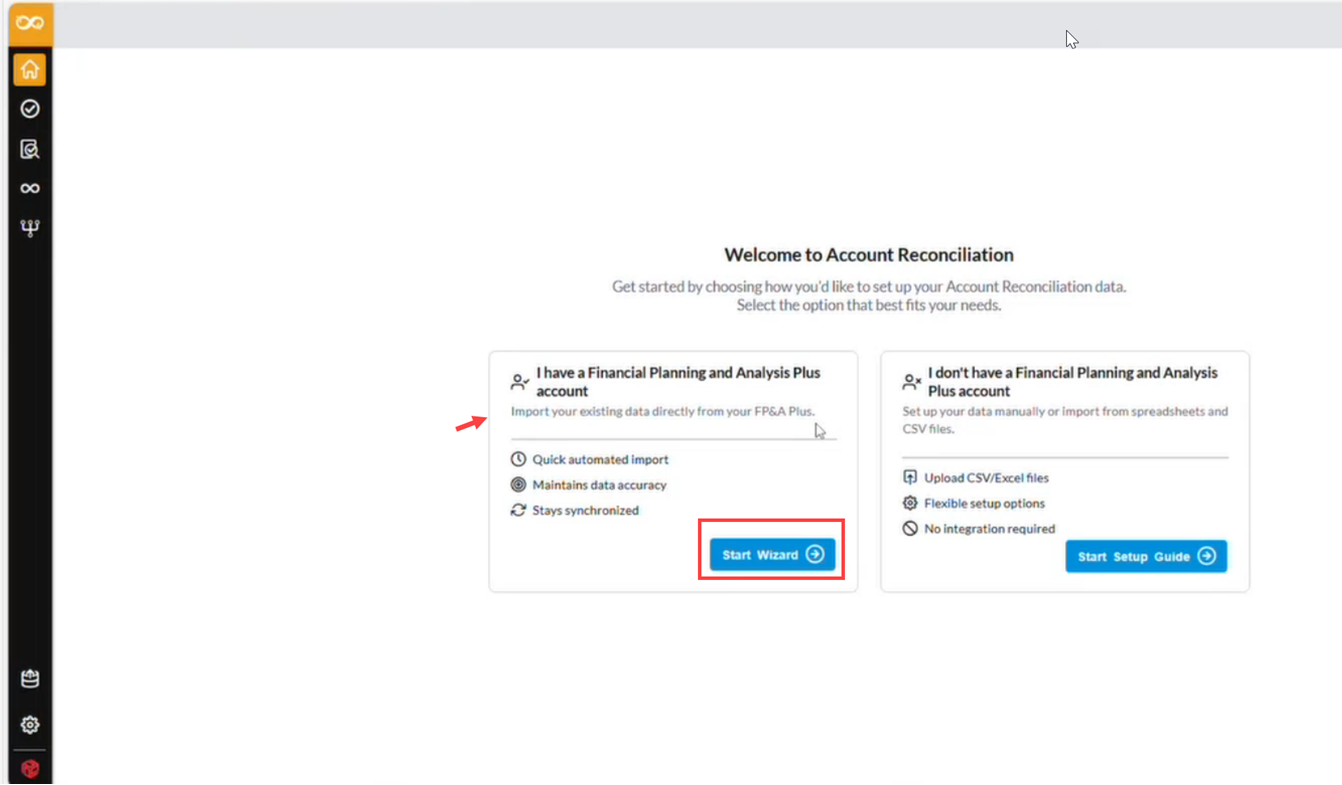
If you use FP&A Plus, you can fast-track your AR setup by importing your existing data directly into Account Reconciliation.
When you access an Account Reconciliation (AR) tenant for the first time, the system automatically detects whether you have access to FP&A Plus. If access is confirmed, the AR Setup Wizard presents an option to import your existing FP&A Plus data directly into AR.
Before you begin
Before setting up Account Reconciliation (AR) using data from FP&A Plus, confirm the following:
-
You have access to both the Account Reconciliation and FP&A Plus applications within Prophix One.
-
Your user account is configured with the token exchange API, which allows the system to recognize your access across both applications.
-
You have at least one FP&A Plus tenant available, as the AR setup wizard pulls the tenant list directly from your FP&A Plus application.
This process uses a token exchange API to establish the connection between applications, eliminating the need to manually generate and save a personal access token (PAT). Authentication is handled automatically.
Summary of steps
Here is a summary of the steps required to set up AR using data from FP&A Plus:
-
Open your AR tenant. If the system detects your FP&A Plus access, the Setup Wizard launches automatically with the import option displayed.
-
In the first drop-down, select the FP&A Plus tenant from which you want to import data. Only the tenants you have access to appear in this list.

-
Select the model from which to pull data. The available models are fetched from the tenant you selected.
-
Select the entity dimension to use for creating entities in AR. All dimensions are available for selection except Account, Time, Time Perspective, and Version. Select the dimension values you want to use. These values are pulled from the selected dimension in the FP&A Plus model.
-
Select the time period for period creation in AR. Available periods are pulled from the Time dimension of the selected model.
-
Select the accounts to import. Account data is pulled from the Account dimension of the selected model. Only the child accounts under a parent are created as accounts in AR. Parent accounts are treated as account types, not individual accounts.
-
Optionally, add account groups.
-
Optionally, configure an auto-reconcile rule.
Tip: Select Balance is zero to automatically mark reconciliation tasks as complete for accounts where the balance is expected to be zero.
-
-
Configure the import balance settings.
-
Review the summary page, which displays all selections made in the previous steps.
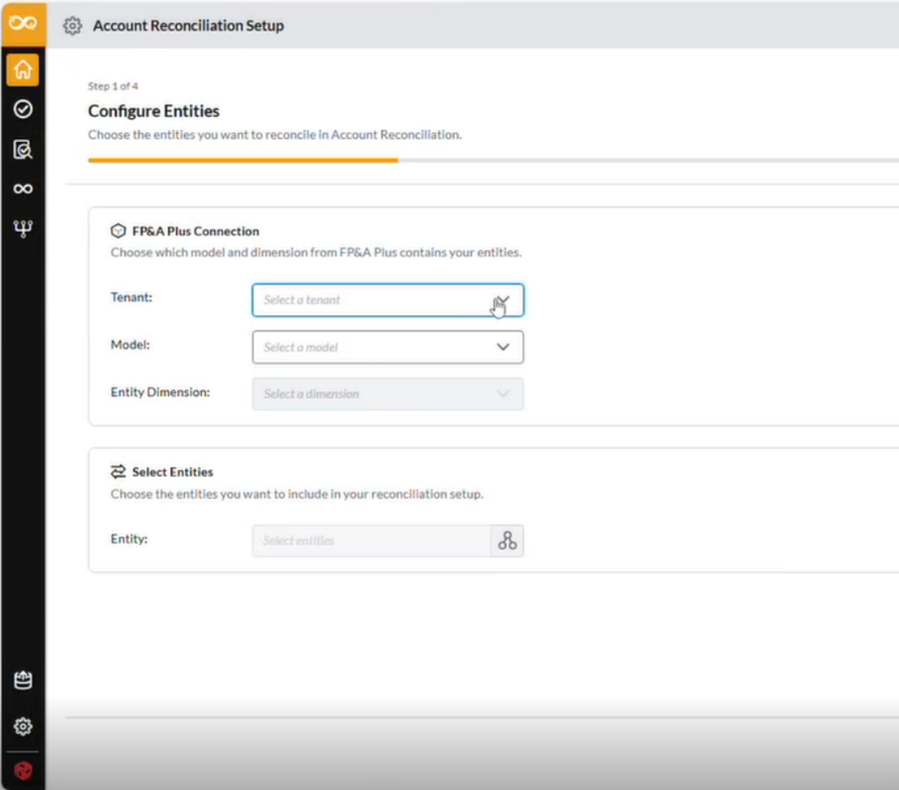
Configure Entities
Use this section to connect Account Reconciliation (AR) to FP&A Plus by selecting a tenant, model, entity dimension, and entity members. Complete these steps in order — each selection depends on the one before it.
1. Select a Tenant
The tenant defines the context AR uses to retrieve metadata from FP&A Plus.
-
Open the Configure Entities page in AR.
-
In the Tenant field, do one of the following:
-
If you have access to multiple tenants, select the appropriate tenant from the drop-down list.
-
If you have access to only one tenant, the field displays the tenant name in read-only mode. No selection is required.
-
-
Confirm your selection before proceeding. The Model drop-down is not available until a tenant is selected.
Note: The tenant list is retrieved from FP&A Plus using a secured API call. If the list does not load, an error message appears. Check your connection or contact your administrator.
2. Select a Model
The model determines which dimensions and metadata AR retrieves from the selected tenant.
-
After selecting a tenant, click the Model drop-down.
-
Select the model you want to use for reconciliation.
-
Confirm your selection before proceeding. The Entity Dimension drop-down is not available until a model is selected.
Note: If no models are available for the selected tenant, an empty-state message appears. Verify that the tenant has at least one model configured in FP&A Plus.
3. Select an Entity Dimension
The entity dimension tells AR which dimension in the model represents your reconciliation entities.
-
After selecting a model, click the Entity Dimension drop-down.
-
Select the dimension that represents entities in your organization.
-
Confirm your selection before proceeding. The Member Selector is not available until a dimension is selected.
Note: The following dimensions are excluded from the list and will not appear as options:
-
Time
-
Time Perspective
-
Account
-
Version
All other dimensions, including Geography and any custom dimensions, are available for selection.
4. Select Entity Members
Entity members define the specific reconciliation entities AR will create. Only leaf-level (child) members are valid as reconciliation entities.
-
After selecting an entity dimension, click Member Selector to open the member selection panel.
-
Navigate the hierarchy to find the members you want to include.
-
Select one or more members. If you select a parent member, AR will use only its child members as reconciliation entities. The parent itself is not created as an entity.
-
Click
 or confirm your selection.
At least one member must be selected to proceed. AR validates your selections before advancing to the next step. Selected entities are carried forward into the account and period setup.
Define Period
Use the following steps to set up the first reconciliation period. When you select a period, AR automatically populates the associated dates. You can review and edit these dates before proceeding.
1. Select the first reconciliation period
The reconciliation period determines where AR begins tracking and managing reconciliations.
-
Open the Define Period page.
-
Click the Period field to open the period selector.
-
Select a Calendar Month period from the list. Periods are retrieved from FP&A Plus and display in the format Jan 2025.
-
Confirm your selection before proceeding.
Note: Only Calendar Month periods are supported. Sub-month periods such as days are not available. Only Standard period types are supported at this time.
Period selection is required to proceed to the next step.
2. Review auto-populated dates
After you select a period, AR automatically fills in the following date fields:
| Field | Default Value |
|---|---|
| Start Date | First day of the selected month |
| End Date | Last day of the selected month |
| Close Start Date | Same as Start Date |
| Target Date | Preconfigured number of days after the period end date |
These dates are editable. Review each field and adjust if needed.
Date Validation Rules
AR validates your dates before allowing you to proceed. Ensure the following conditions are met:
-
Start Date must be on or before End Date
-
Target Date must be on or after Start Date
If a date entry does not meet these conditions, AR displays a validation message. Correct the date and try again.
Configure Accounts
Use this procedure to load your Chart of Accounts from FP&A Plus, select the accounts to include in reconciliation, and define auto reconciliation rules. Complete these steps in order.
1. Load and select accounts
AR retrieves the Chart of Accounts from the model you selected during entity configuration.
-
Open the Configure Accounts page.
-
Click Member Selector to open the account hierarchy.
-
Expand and collapse hierarchy nodes to navigate the account structure.
-
Select one or more accounts to include in reconciliation.
-
Confirm your selections.
Tip: If you select a parent account, AR uses only its child members as reconciliation accounts. The parent is treated as an account type, not a reconciliation account.
Note: Each account must have a Natural Balance attribute (Debit or Credit) defined in FP&A Plus. AR stores this attribute as part of the account configuration. Accounts without this attribute cannot be used for reconciliation.
At least one account must be selected to proceed.
2. Preview selected accounts
Before proceeding, preview your selections to confirm the configuration is correct.
-
After selecting at least one account, click
 .
. -
Review the following information for each account:
-
Account Code: The unique identifier for the account
-
Account Name: The display name of the account
-
Natural Balance: Indicates whether the account is Debit or Credit
-
Hierarchy Path: The location of the account within the hierarchy
-
-
To make changes, click Back to return to the member selector.
Note: The preview reflects your current selections in real time. Any changes made after returning to the selector are immediately reflected when you reopen the preview.
3. Configure auto-reconciliation rules
Auto-reconciliation rules allow AR to automatically complete or advance reconciliations based on account balance conditions. Rules are applied per account, per period.
Only accounts selected in Step 1 are available when configuring these rules.
Rule 1: Balance is Zero
Use this rule for accounts that should be automatically reconciled when their ending balance is zero.
-
In the Auto Reconciliation Rules section, locate Rule 1: Balance is Zero.
-
Click Member Selector and choose the accounts this rule applies to.
-
Confirm your selection.
How it works: At the end of a period, if a selected account has an ending balance of zero, AR automatically moves that reconciliation to Completed.
Rule 2: No Change Since Prior Period
Use this rule for accounts that should be automatically reconciled when their balance has not changed from the previous period.
This rule requires a prior period to exist. If no prior period is found, the rule does not apply for that account.
-
Locate Rule 2: No Change Since Prior Period.
-
Click Member Selector and choose the accounts this rule applies to.
-
Confirm.
How it works: At the end of a period, if a selected account has the same ending balance as the prior period, AR moves that reconciliation to Pending Approval or Completed, depending on your configuration.
Create Account Groups (optional)
Account Groups are optional. If your reconciliation process does not require grouped accounts, you can proceed to the next step without creating any group.
Account Groups allow you to combine multiple accounts under a single reconciliation task. An Account Group is a named collection of accounts that are processed together during reconciliation. Each group has its own Natural Balance type, which AR uses when applying reconciliation logic.
1. Create an account group
-
On the Account Groups page, click Create Group.
-
In the dialog that opens, complete the following fields:
-
Code: A unique alphanumeric identifier for the group
-
Name: A descriptive name for the group
-
Group Type: The classification of the group, such as Asset or Liability
-
-
Click
 to create the group.
2. Add accounts to the group
Only accounts selected during the Configure Accounts step are available here. At least one account must be added before the group can be saved.
-
After creating the group, click Member Selector to open the account selection panel.
-
Select the accounts to include in the group.
-
Confirm your selections.
Note: The same account cannot appear more than once within the same group. AR will flag duplicate selections before saving.
3. Set the Natural Balance Type
-
In the Natural Balance field, select either Debit or Credit for the group.
This setting is required and determines how AR processes reconciliation logic for the group.
4. Edit /Delete an account group
You can modify or remove a group at any time during setup.
To edit a group:
-
Locate the group in the Account Groups list.
-
Click the edit option for that group.
-
Update the Code, Name, or Group Type as needed.
-
Click Save.
To delete a group:
-
Locate the group in the Account Groups list.
-
Click the delete icon next to the group.
-
Confirm the deletion when prompted.
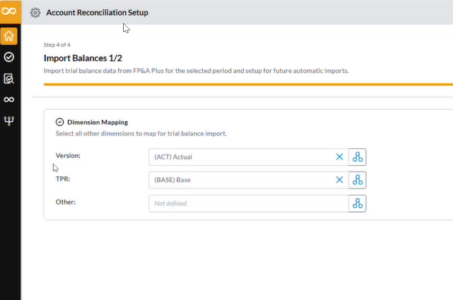
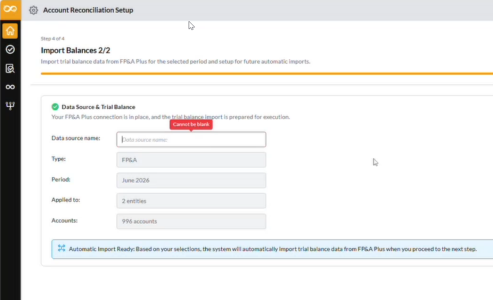
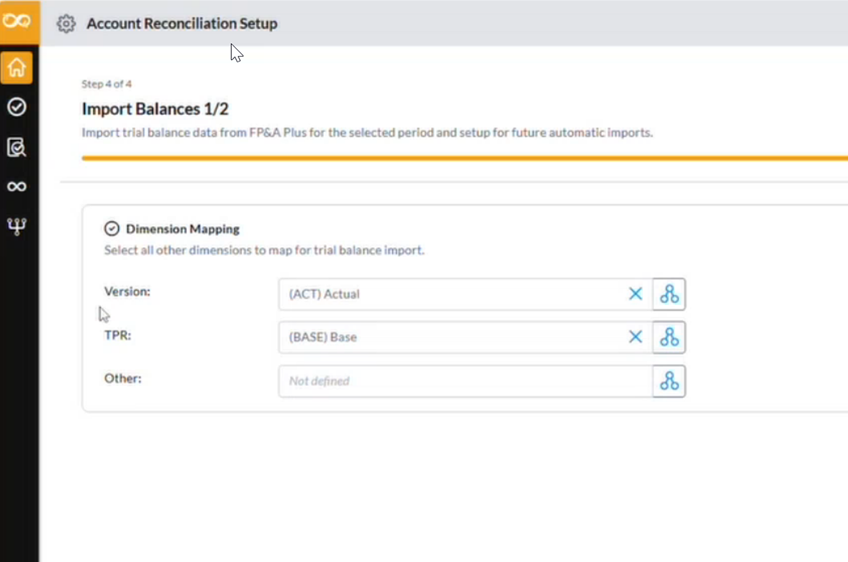
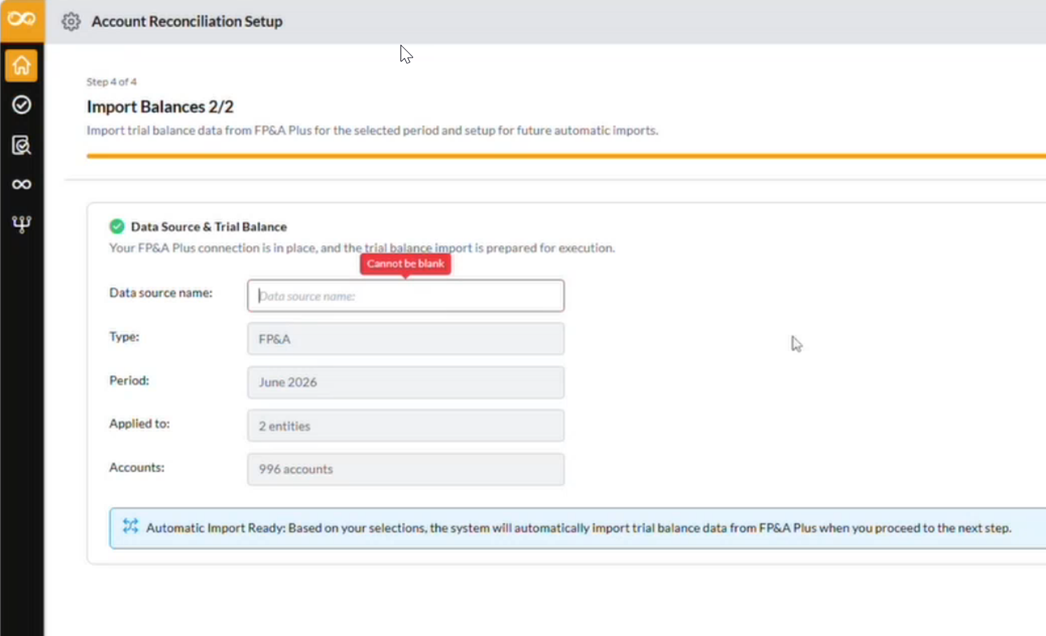
Configure Import Balance settings
-
Select the dimensions from which AR will fetch balances from FP&A Plus. By default, Version is set to Actual and Time Perspective is set to Base. Both values can be edited.
-
Complete the remaining dimension selections as needed.
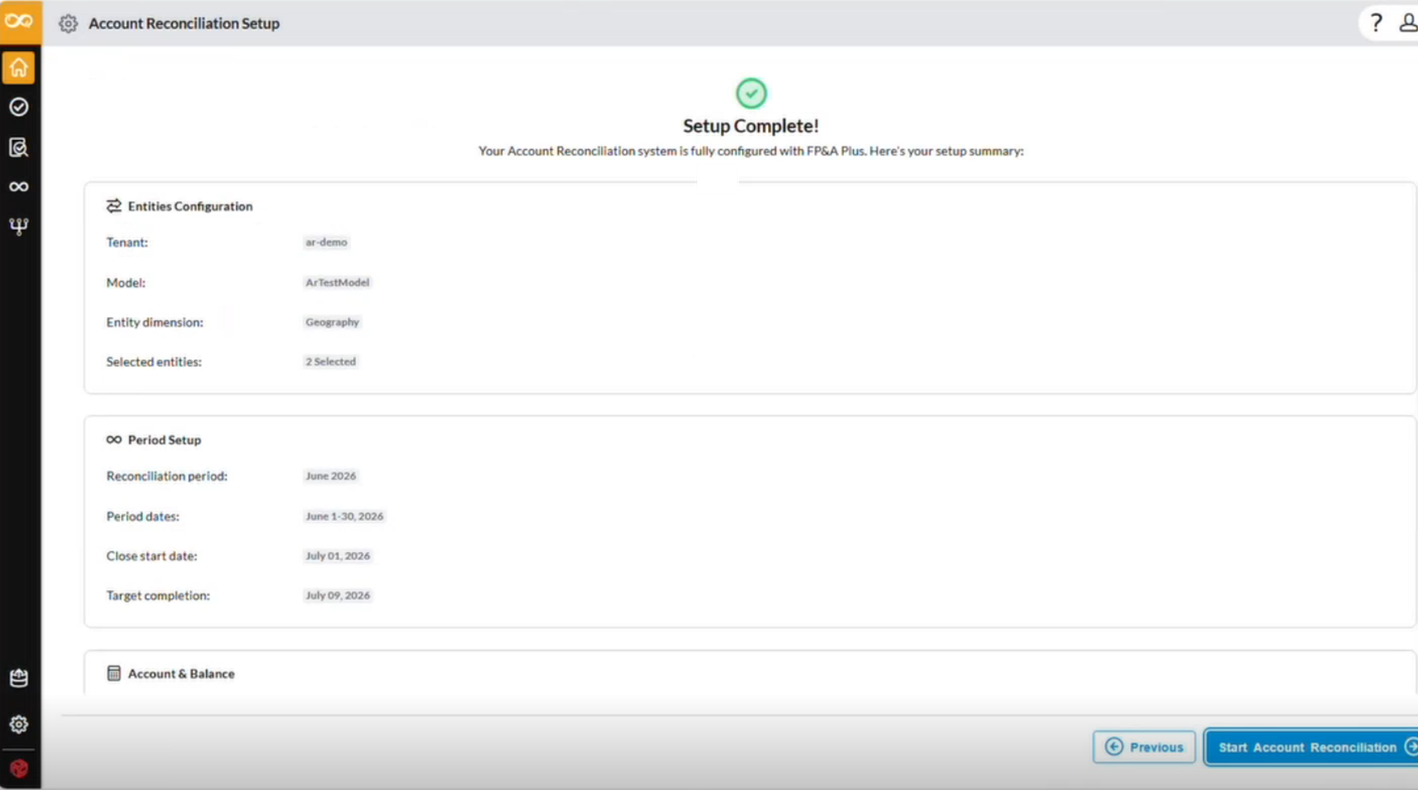
Review and finalize setup
After completing all setup steps, AR displays a read-only summary of your configuration. Review this summary carefully before starting the reconciliation setup process. When ready, start the reconciliation. AR creates the entities, periods, accounts, account groups, and data source based on your selections, and imports the balance data from FP&A Plus.
1. Review the setup summary
The Setup Complete page displays a full summary of your configuration. No fields on this page are editable.
If you need to make changes, return to the relevant setup step before proceeding.
Review the following information on the summary page:
| Section | Details Displayed |
|---|---|
| Tenant | Selected tenant |
| Model | Selected model |
| Entity Dimension | Selected dimension |
| Selected Entities | All entities chosen for reconciliation |
| Period | Selected period, including start date and target date |
| Accounts | All accounts selected for reconciliation |
| Account Groups | Configured groups, if applicable |
| Auto Reconciliation Rules | Configured rules, if applicable |
| Balance Import Metadata | Selected metadata structure, including Version, Classification, Currency, and any custom dimensions |
| Data Source Name | Name assigned to the FP&A Plus data source |
2. Start reconciliation setup
When you are satisfied with the summary, click  to begin the finalization process.
3. Monitor finalization progress
After clicking , AR navigates you to the setup progress page displaying each configuration step and its status as AR works through the process.
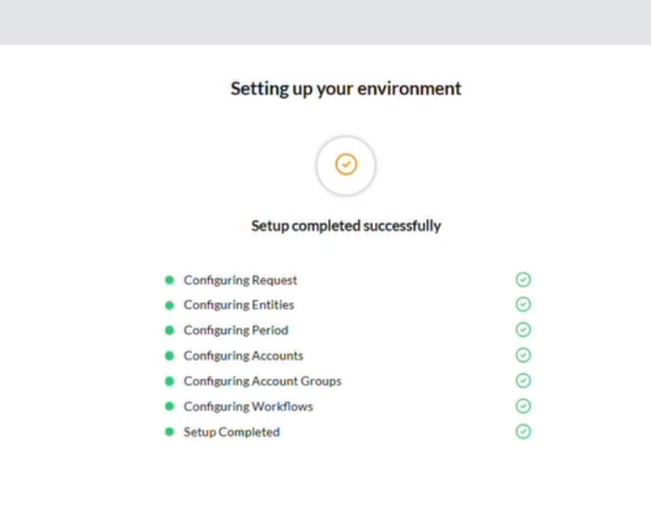
Caution: Do not navigate away from this page while final setup is in progress. AR must complete all steps before setup can be marked as finished. Completed steps are marked with a check indicator as AR progresses.
| Step | Description |
|---|---|
| Configuring Entities | Creates reconciliation entities from your selections |
| Defining Period | Establishes the initial reconciliation period |
| Configuring Accounts | Creates accounts and account groups |
| Importing Balances | Executes the initial trial balance import from FP&A Plus |
| Setting up Workflows | Applies auto reconciliation rules and workflow configuration |
| Finalizing Setup | Completes and activates the AR environment |
Finalization errors
If a step fails during finalization, AR displays an error message and stops the process. Setup is not marked as complete until all steps finish successfully.
Depending on the error, you may have the option to retry the failed step or return to the relevant setup page to correct the configuration.
Review the error message for guidance, and contact your administrator if the issue cannot be resolved.