Account Groups act very similarly to Accounts. Account Groups when created have all of the same properties associated with them as an Account would. The only additional field is the Accounts field where the accounts that make up the Account group are defined.
With Account Groups, users can group related accounts for reconciliation, eliminating the need to reconcile each account separately.
Note: An account can only belong to one group.
Create an account group
With Account Groups, users can group related accounts for reconciliation, eliminating the need to reconcile each account separately.
-
Navigate to the Accounts page.
-
Click the Account Groups tab.
-
Click
 and in the Properties pane, provide the following information required to create the new account group:
-
Code: A unique identifier for the account group. Learn about requirements for codes.
-
Name: A meaningful name that describes the accounts in the group, for example, Prepaid accounts.
-
Group type: Type of accounts in the group, for example, Prepaid.
-
Accounts: Assign specific accounts to the group. Click
 to open the Select Accounts dialog and select the relevant accounts to add to the group.
 Note: If an account already has a workflow task assigned for the current period, you cannot add it to an Account Group. To include the account in an Account Group, you must first delete any associated workflow tasks.
-
Natural Balance Type: This can debit balance, credit balance, or neither.
Note: Natural Balance is referenced by the Reverse Credits option when importing GL balance data.
-
Trial Balance Category: Major accounting category, for example, assets, liabilities, etc.
-
Layout: The format for displaying supporting items on the Account Reconciliation page. If you want to use any layout other than the default, choose from the drop-down list.
Note:If reconciliation has already started (i.e., supporting items or adjustments have been added to the account), the Layout field will be disabled.
To assign a different layout to an account where reconciliation has already started, you have two options:
-
Delete all supporting items or adjustments added to the account, OR
-
Delete and recreate the account and its associated workflow, then assign the new layout.
For more information about layouts, see Assign layout to an account in the Set up Layouts article.
-
-
Frequency: Indicates how often the account is reconciled (Monthly, Quarterly, Yearly).
If all accounts in the Account Group have the same Frequency, that Frequency is automatically inherited.
If accounts have mixed Frequencies, the Account Group Frequency remains None and you must manually select a value. -
Auto reconcile: To enable auto reconciliation select an option. For example, If zero balance is selected, and the GL balance for this account is zero during import, the associated tasks will be automatically reconciled. The task status will then be updated to the value specified in the Status field below.
-
Status: This is related to the Auto reconcile field. Choose a status to apply to auto reconciled items after the import.
-
-
Click
 . The selected accounts are now grouped together and created under the account group.
 Tip: After accounts are grouped the following occur:
-
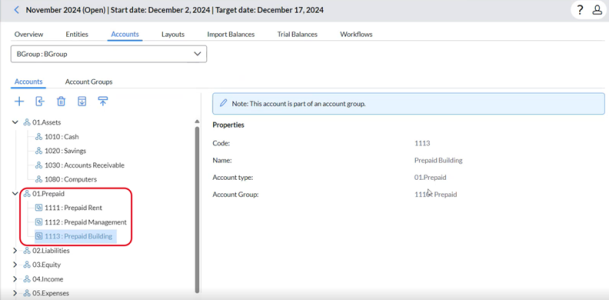
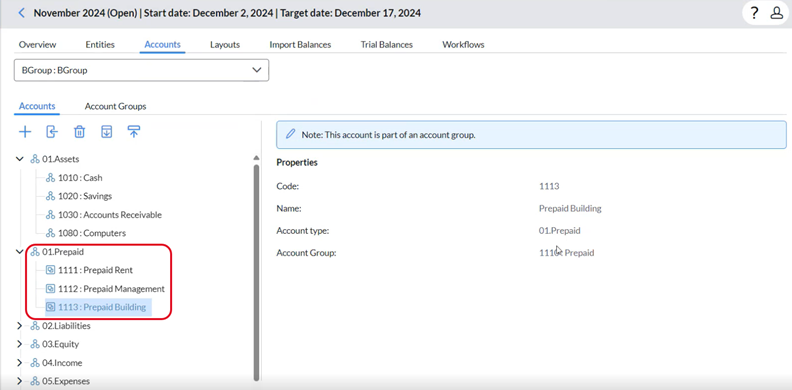
In the Accounts tab, the system clearly identifies them as part of a group in the accounts list. Users are alerted that these accounts are now governed by the rules of the group, limiting direct edits to individual accounts.
-
On the Workflow Details page, when creating tasks, individual accounts within a group no longer appear as separate accounts. Instead, the account group itself is shown as a single unit. Tasks can be created for the account group and all the accounts will inherit the task settings.
-
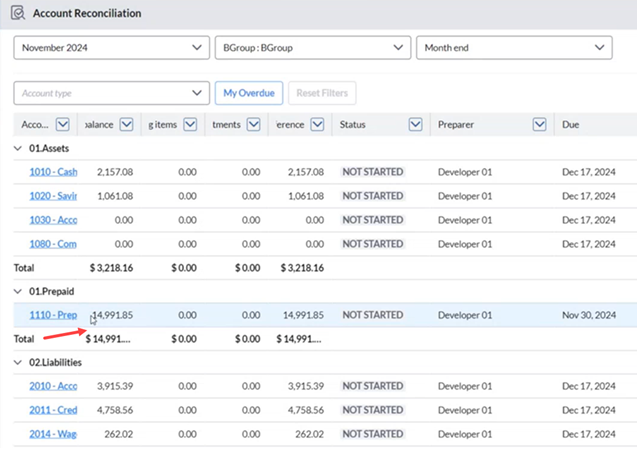
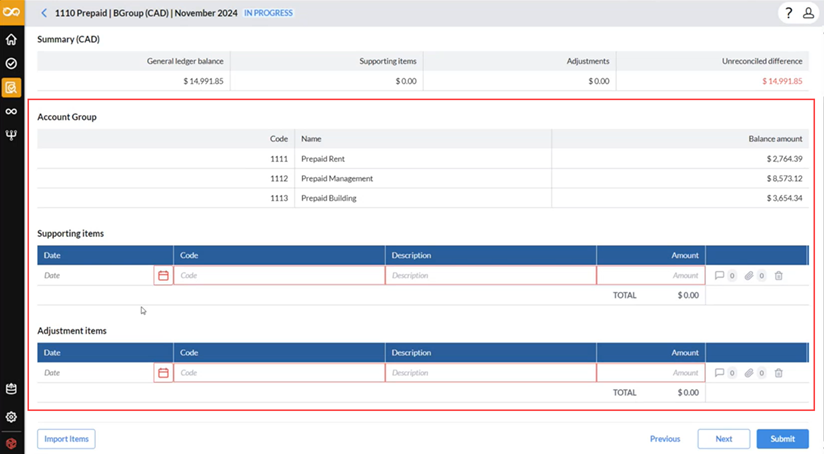
On the Account Reconciliation page, the GL Balance displayed for the account group task is the cumulative General Ledger (GL) balance of all accounts in the group. The GL balance value represents the total of all grouped accounts rather than individual balances.

-
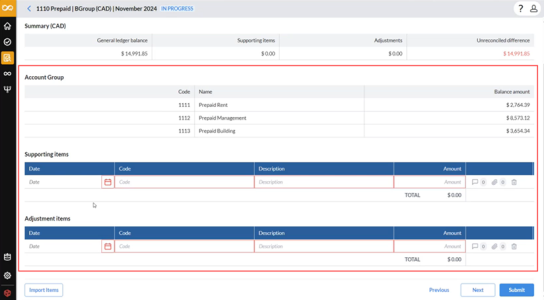
The Account Reconciliation Details page displays the following for the account group:
-
A breakdown of each account in the group and its respective balance.
-
Supporting and adjustment items associated with the group, displayed as they would for singular accounts.
-
-
Delete an account group
You can delete an account group, but proceed with caution—this action will delete all associated tasks.
-
In the Account Groups tab, select the group to delete.
-
Click
 . A warning is displayed.
 -
Confirm your action.
Balances for account groups
Balances are still imported at the individual Account level. The account group balance is just an aggregation of all of the member accounts balances. See Import General Ledger balance.
Natural balance types for account groups
An account group can include accounts with different natural balances to create a “Net” account. You can assign a natural balance to the Account Group, and the system will net the individual account balances accordingly.
Account Group balances are calculated according to the natural balance type: Credit, Debit, or None, defined for the parent group. This ensures that parent-child account relationships are accurately reflected in the group balance.
The calculation logic works as follows:
-
If the Account Group is Debit:
The system calculates the group balance as Debit - Credit.
Any child account with a natural balance type set to None inherits the Debit property from the parent group.
Example:
-
Debit accounts total: $24,005
-
Credit accounts total: $24,001
-
Calculation: 24,005 – 24,001 = $4 (Debit)
-
-
If the Account Group is Credit:
The system calculates the group balance as Credit – Debit .
Child accounts with a natural balance type of None inherit the Credit property from the parent group.
Example:
-
Credit accounts total: $24,001
-
Debit accounts total: $24,005
-
None accounts total: $3,001
-
Calculation:Credit accounts total: 24,001 + Net accounts total 3,001 - Debit accounts total
27,002 – 24,005 = $2,997 (Credit)
-
-
If the Account Group is None:
When the parent group is set to None, all child balances are simply summed together, regardless of their individual natural balance types.
Example:
-
Account 1 (Debit): $12,000
-
Account 2 (Credit): $12,010
-
Account 3 (Debit): $12,002
-
Account 4 (None): $12,000
-
Calculation: 12,000 + 12,010 + 12,002 + 12,000 = $48,012 (Total)
Because the parent group’s natural balance is None, the calculation does not apply credit or debit rules, it aggregates all balances.
-
Assign an account group to an account reconciliation workflow task
An account group is assigned the same way as an individual account in an Account Reconciliation workflow task.
On the Add New Workflow Task page, select the account group in the Account field. All the accounts within the group will be automatically assigned to the workflow task. For more details on adding workflow tasks, see Add and manage workflow tasks.
Note: On the Account Reconciliation task Details page, the account group displays as individual accounts adding up to the balance being reconciled: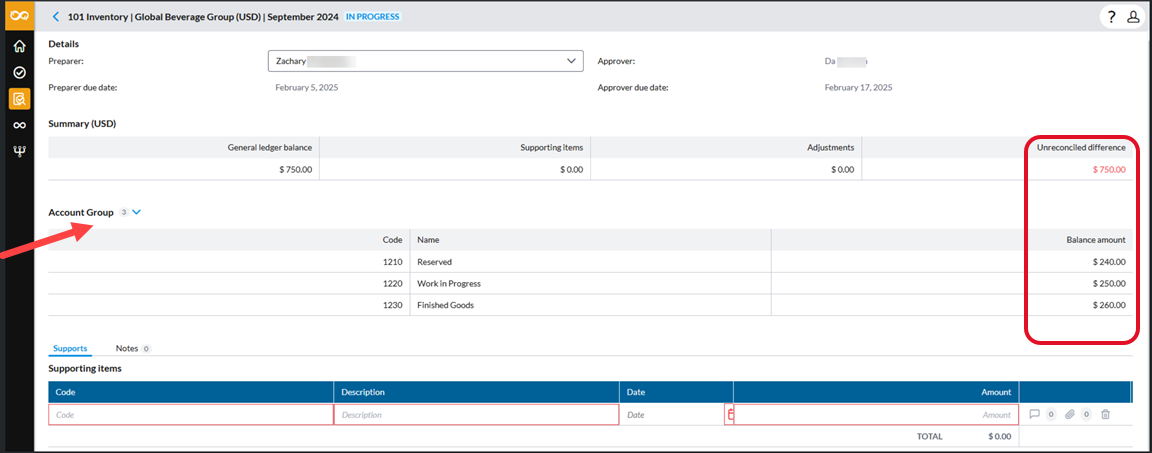
Roll forward account groups
This is the same as rolling forward tasks and supporting items for individual accounts. For details on rolling forward accounts, see Roll forward accounts.