A close period is a time-frame for which an account reconciliation is completed, for example, March 2024, Q1 2024. Every period has a start date and a close date. Close periods have associated frequencies, for example, they can occur monthly, quarterly, yearly, etc.
Account reconciliation operates within specific close periods, which are linked to entities and their associated accounts, trial balances, reconciliation tasks, and to-do items.
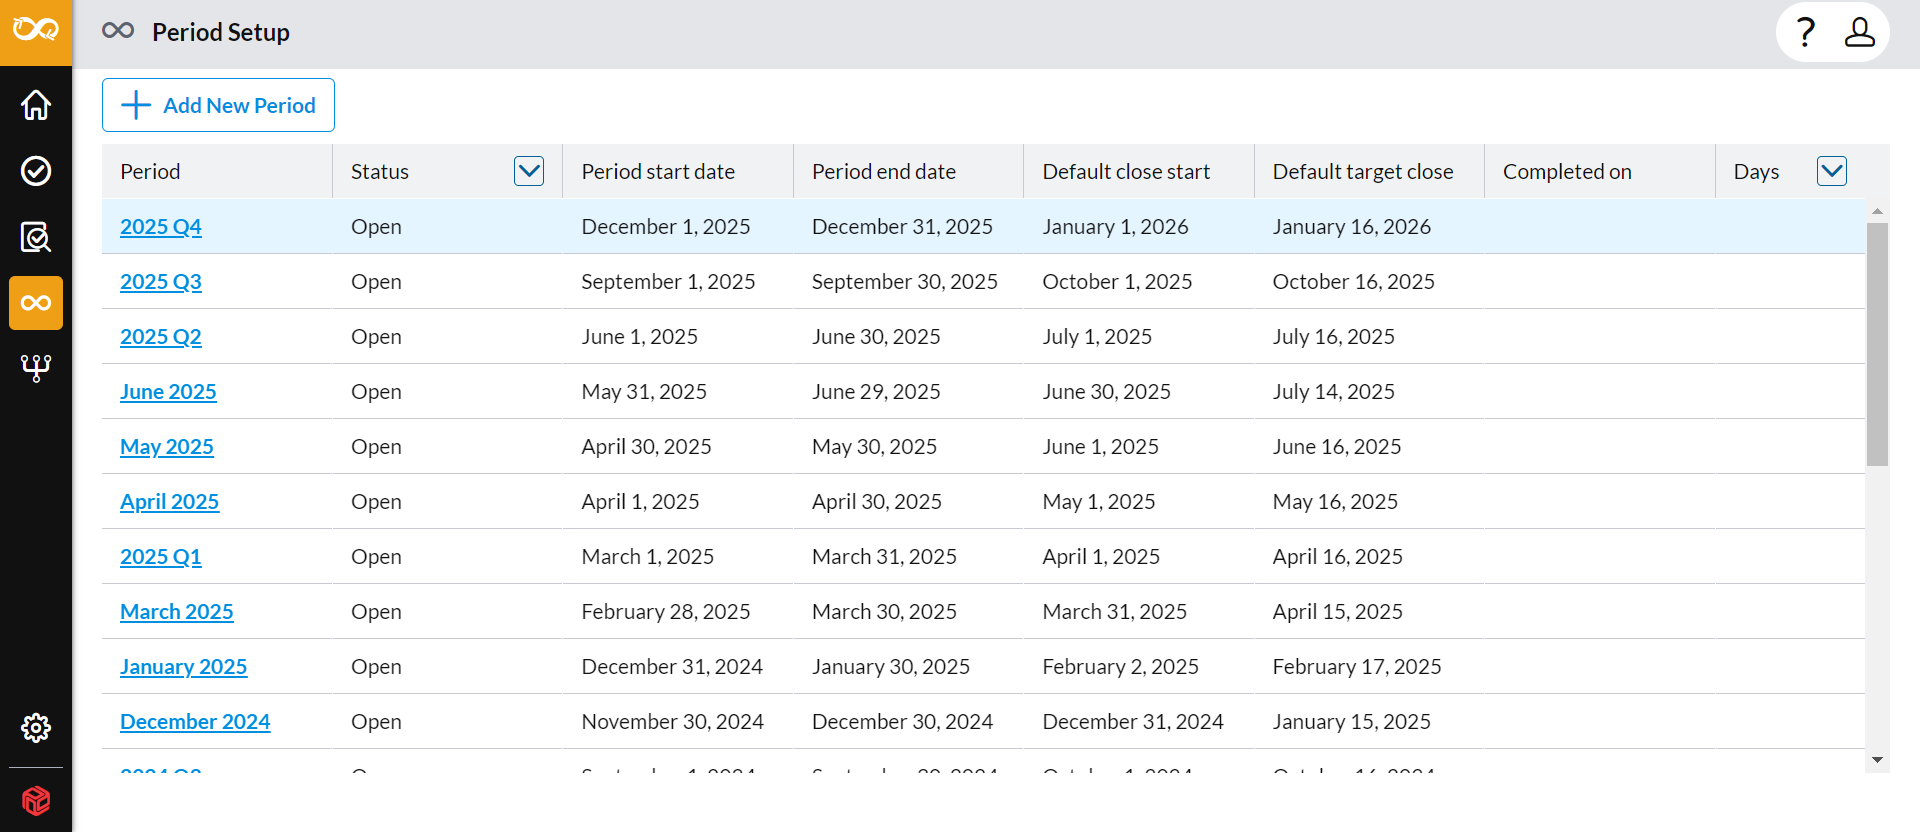
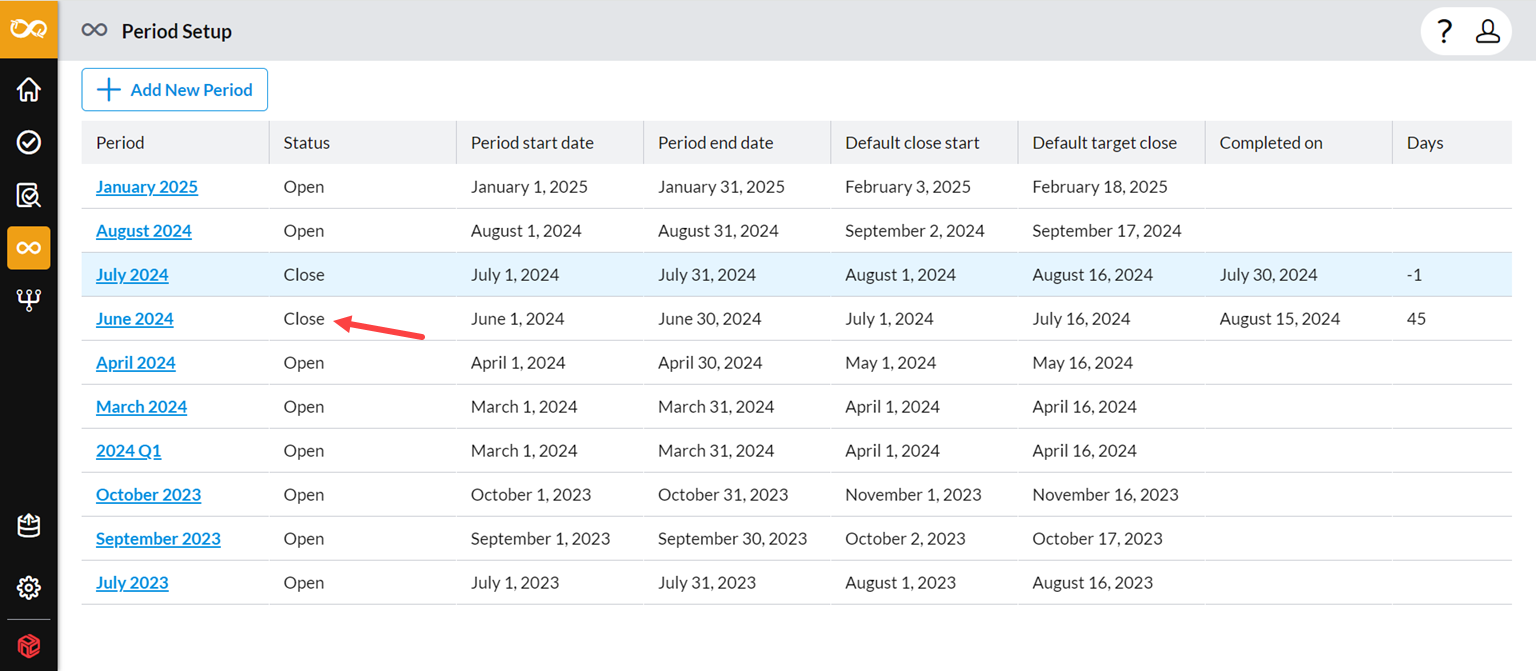
Close periods are managed on the Period Setup page.
Access the Period Setup page
-
On the navigation menu, click
 to open the Period Setup page.
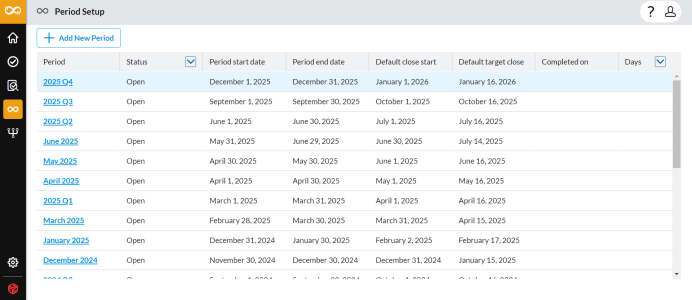
-
Period: Name of the close period.
-
Status: Status of the period. Status can be Close or Open. You can use status to filter periods. To filter by status , click
 .
. -
Period start date: Start date of the close period.
-
Period end date: Date on which the close period ends.
-
Default close start: The default date on which the close process begins for all entities. When workflows are rolled over from a previous period, the close start date is used as the reference point to adjust all preparer due dates. This can be customized for each entity's workflow, though it is typically set as the default value for the period during setup.
-
Default target close : Date by which period is expected to be closed. All accounts are expected to be reconciled by this date.
-
Completed On: Date on which account reconciliation is completed.
-
Days: This is used to filter periods by the remaining days until, or number of days past, the target close date. To filter by days, click
. -
Actions: The actions you can take on a period. For example, Close, Setup, etc.
-
Add a new period and its associated workflows
-
From the menu, click
and then click  to open the Add New Period page.
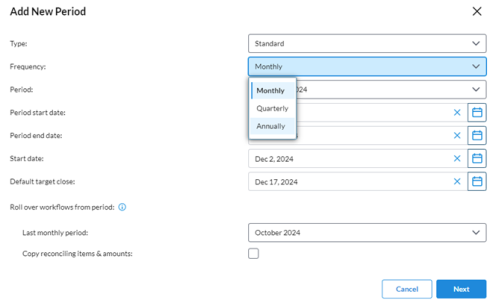
-
On the Add New Period page, provide the following information:
- Type: The Period type, either Standard or Custom. Standard uses the month name as the period name, while Custom allows the users to define their own period names like “Period 1” for non-standard naming conventions.
- Frequency: When and how often (monthly, quarterly, yearly). Monthly is selected by default.
-
Period: The specific time-frame for the reconciliation activities. Choose from the list.
Note: If Frequency is Custom, you are required to enter a unique period name.
-
Period start date: The start date of the accounting cycle that will be considered in the close period.
-
Period end date: The end date of the accounting cycle that will be considered in the close period.
-
Start date: Start date for reconciliation activities.
-
Default target close: End date of the close period when reconciliation is completed.
-
Roll Forward From: Displays the roll forward options applicable to the chosen Frequency. For details on rolling forward periods, refer to Roll forward accounts.
-
Copy reconciling items & amounts: Copies reconciling items and amounts from a period to the one you are creating.
-
If Frequency is Monthly, only supporting items and tasks with a Monthly frequency are rolled forward.
-
If Frequency is Quarterly, only supporting items and tasks with a Quarterly frequency are rolled forward.
-
If Frequency is Yearly, only supporting items and tasks with a Yearly frequency are rolled forward.
-
-
-
Click
 .
. -
Click
 . The Period is created and the Overview tab displays the summary of the newly created period.
 -
Now, you can proceed to set up the period, including adding entities, accounts, layout, workflows, and importing general ledger and trial balances. See Set up a period.

View period overview
The Overview tab displays a summary of the selected period.
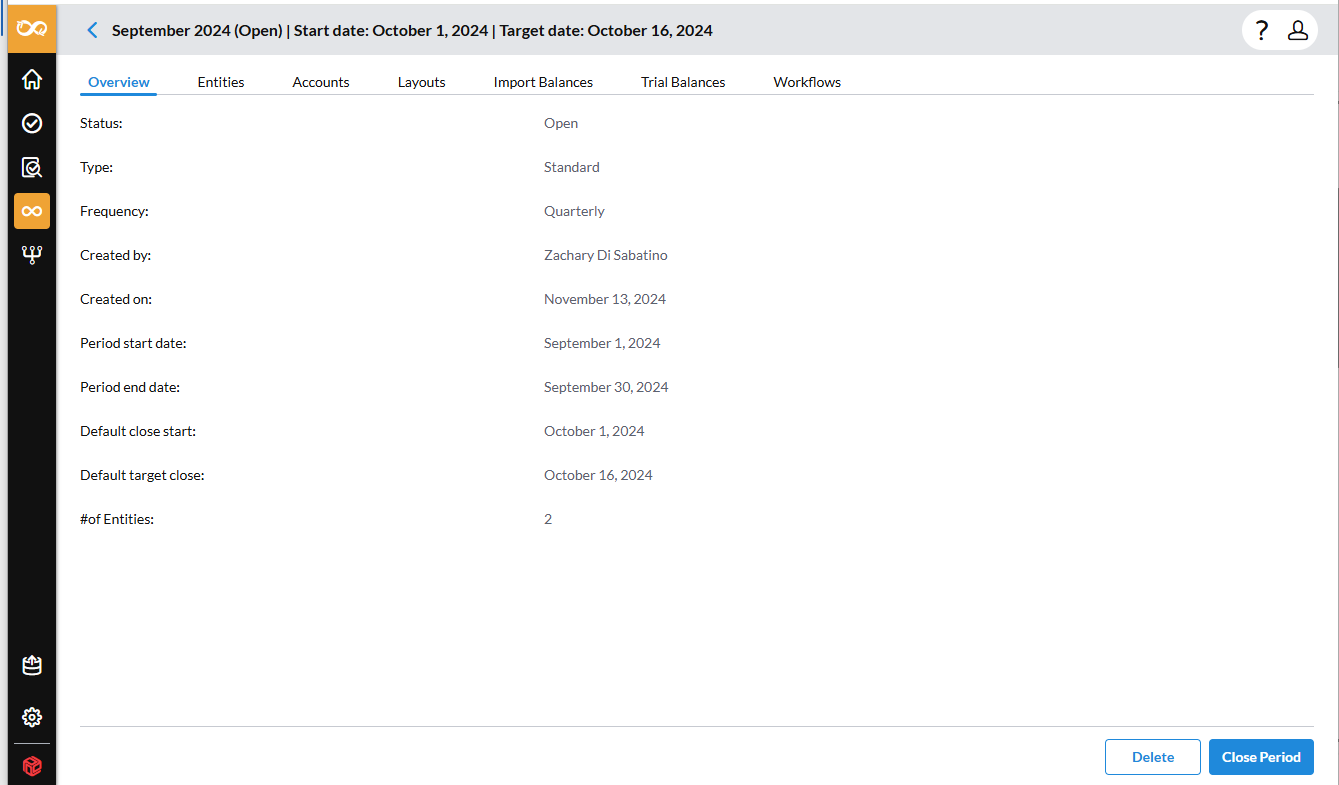
Note: The # of Entities indicates the number of entities in the entity master list that can be associated with the period.
-
When you add a period, the Overview page automatically opens, displaying a summary of the period.
-
To view details of an existing period, click
to open the Period Setup page. Then, click on the period whose details you want to view.
On this page, administrators can close the period or delete the period.
Set up a period
After you have created a period, you can now proceed to set up the period. Setting up a period includes adding entities, accounts, workflows and importing general ledger balance and Trial balance to the close period.
-
On the Period Setup page, click on the period you want to set up.
-
The Overview tab displays a summary of the selected period.
-
The period details page is displayed with the Period name, Status, Start date and Target date on top.
-
-
Click the Entities tab and from the list of available entities for the period, select an entity to associate with the period.
Note: This list will display only entities whose start date is on or before the period's start date and whose end date is after the period's end date.
If the entity you want is not listed here, go to the Settings page and add the entity to the master list, ensuring that the start and end dates align with those of the period. Refer to Set up and manage entity master list.
-
Now, proceed to do the following:
-
Add Accounts. Refer to Set up and manage accounts.
-
Add Layout. Refer to Set up layout.
-
Import (GL) Balance. Refer to Import general ledger balance.
-
Upload a Trial Balance. Refer to Import trial balance
-
Add Workflows. Refer to Set up workflow and tasks.
-
Close and lock a period
-
Click
to open the Period Setup page. -
Click on the period you want to close. Details of the period are displayed on the Overview tab.
-
Click
 . The period is closed and the Status changes to Closed.
-
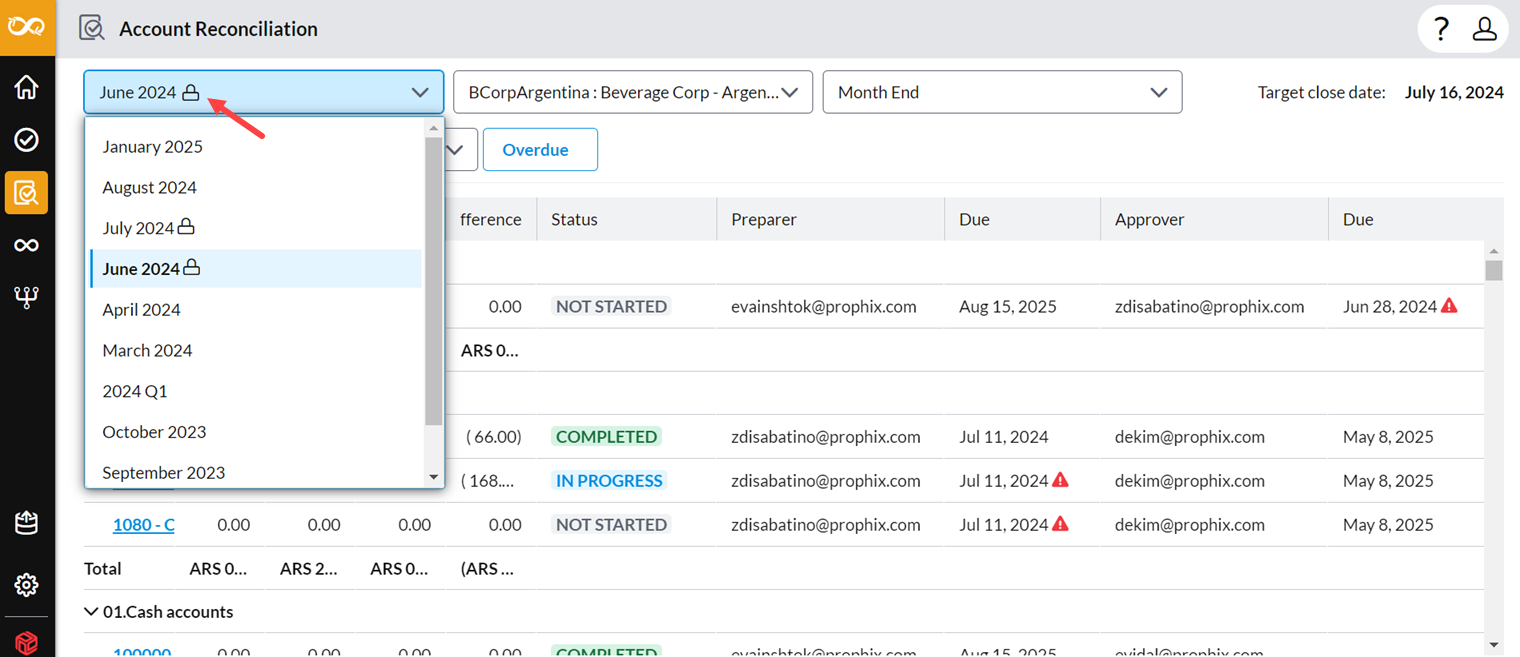
Additionally, on the Account Reconciliation and To do pages, a lock icon appears beside the closed period.
-
Users cannot take action on a closed period as it remains closed until reopened. You must reopen the locked period before users can take any action on a task in any locked period.
-
All account reconciliation tasks of a closed period are hidden from all users but remain visible to administrators.
-
Open a closed period
-
Click
to open the Period Setup page. -
Click on the closed period you want to reopen. Details of the period are displayed on the Overview tab.
-
Click
 . The period is opened and the Status changes to Open.
 Users can now work on tasks in the reopened period.
Delete a period
Caution: Deleting a period deletes all the accounts, layouts, and workflow associated with the period.
-
Click
to open the Period Setup page. -
Click on the period you want to delete. Details of the period are displayed on the Overview tab.
-
Click
 . The following warning is displayed.
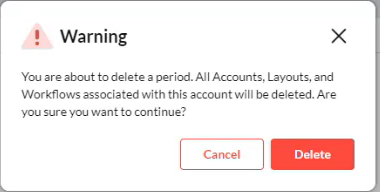
-
Confirm your action.